I remember being very excited to register for our wedding.  After the husband and I moved in together we did the whole merging of the worlds exercise.  For example, we kept his couches, but I got to keep my bedroom set.  Deciding what to keep vs. discard was a fairly easy process for us.  However, nothing in our apartment was really “ours”.  For example our kitchen dishes were handed down to me from my mother when she redid the kitchen — this was back when I was still in college.  They have got to be at least 10 years old. The dishes have really held up well, but we wanted dishes that we had chosen together.

Side Note – I think this is officially my second blog post with no pictures.  The problem is I didn’t take pictures when we went on these registry excursions.  I was going to take pictures of our wedding gifts, but didn’t think that would be fun to look at LOL.  In any event I hope you enjoy the post and I promise to have pictures in the next post! :)

The husband I scheduled an evening to do our first round of registering.  Off to Crate and Barrel we went.  Despite sitting in traffic for an hour to get the big Tyson’s Corner store instead of going to the smaller store in DC I was in great spirits.  We walked up to the counter “hi we need to register”, which was followed by the whole, congrats, when is the wedding and here’s how you work your scanning gun.  Okay now where do we start?  I had done a little pre-shopping online and we had agreed on some glasses. Scan – enter quantity.  Ummm how many do we need?  I had no idea and my husband looked at me smiled and shrugged his shoulders.  After just sort of staring at each other for 30 seconds he reminds me we can update the quantity online.  Okay great we can do that later so there is no need to worry.  Now what?

Imagine walking around the store for over an hour and randomly choosing things.  We had no idea what we needed or how much.  There were also a few items we couldn’t agree upon.  We left the store a bit defeated, okay maybe a lot defeated!  I thought registering would be easy and fun … not so much.  As we returned our scanner they gave us two heart shaped champagne glasses as a gift!  At least there was a little reward at the end of our attempt to choose things for the registry.

As we drove home I texted one of my bridesmaids, who also recently got married, and reported our less than successful registry experience.  She had some great advice for us … take a parent (or parents) with you to register.  The parents are able to help with how many of an item you need, what stuff  you will want to have that you might not be aware of and when needed the parent can mediate the choosing process. =)

This is exactly what we need!!  My mother (more than) happily agreed to accompany us to the next store and provide us with her expert advice!  A few weeks later when the husband and I were visiting my parents we headed to Bloomingdale’s with my mom.  We were a lot more successful the second time around and both found her suggestions extremely helpful.

So there you have it … our wedding registry experience in a nutshell.  Do you have any tidbits from registering that might help a current/future bride to be??

Happy planning!

Don’t forget to leave your tidbit by commenting and/or add Life’s Tidbits to your RSS Reader :)

Share

A few weeks ago we went to a friend’s beach themed wedding.  She had EVERY detail covered.  Knowing the amount of time and effort even small details take I can’t even imagine how many hours my friend put into everything for her wedding.

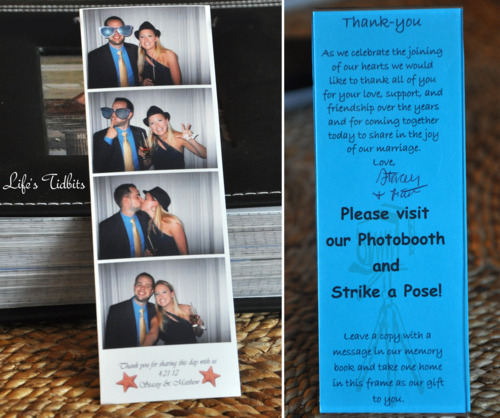
At her bachelorette party she mentioned they were going to have a Photo Booth at the wedding.  I had been to a wedding last year with a photo booth and loved it. At the last wedding I had taken pictures with friends, but by the time the husband and I made it to the booth it was closed.  Total pout! So this time I was determined to get a photo booth picture with my lovely husband.

After quickly locating the photo booth during cocktail hour I noticed a poster board.  On the posterboard there were a few photobooth pictures of my friend and (now) husband from other weddings.  She had the photo booth picture strip size increased and then added some cute text about taking pictures in the booth. I wish I had taken a picture of the poster board to show you exactly what it looked liked.

It took us the first two shots to understand where to look and how the booth worked. You would think two grown adults could successfully take pictures, but I guess we aren’t coordinated enough hahaha.  Here’s how our pictures came out:

See what I mean? The first two we are a little caught off guard.  When we sat down at the table in the reception room we found these cute frames to put our photobooth picture into.

Each frame had a message from the bride and groom.  On the back there was a clear label with our name on it so we knew which frame was ours.Such a cute detail! I just love the message and idea to send each guest home with a frame.  Check it out!

And can you believe it … each one was hand signed by the bride and groom!  I told you this bride had every detail covered! :)

The cost of the frames seem pretty reasonable. I did a little Googling and found a number of places like this one.  There are many places that sell the perfect size frames for photobooth picture strips.

Have you seen this tidbit at a wedding before?

Happy wedding planning!!

Don’t forget to leave your tidbit by commenting and/or add Life’s Tidbits to your RSS Reader :)
Share

The title sounds worse than it is by A LOT, but I thought it accurately summed up the situation.  My husband will tell you I am one of those people who loves something in the store (or online) and then immediately second guesses my choices once the item is purchased and home.  For example when we got our dining room table chairs I obsessed about if the cream went okay with the beige/darker cream couches we have. I think it took a good two weeks for the buyers remorse to dissipate.  I love the chairs and think they look great … so seriously what was up withe the buyers remorse?

If it happens with purchases like a pair of jean or a chair, then clearly the buyers remorse would kick in for a wedding dress, right?

I started watching “Say Yes to the Dress” before I got engaged and once we were engaged I thought heck I will try on 5 or 10 dresses and find the one I want quickly.  Unfortunately I wasn’t a 5-10 dress kind of bride. I think I was probably more in the 30-40 range.  I would chalk a lot of that up to trying on almost any dress suggested so I could narrow down what it was I really wanted.

I tried on a lot of dresses before deciding on THE dress. The day I found my wedding dress I was with my MOH and one bridesmaid.  And just to make things interesting the dress I decided was THE ONE happen to be part of a trunk sale.  This dress was only going to be in the store for that weekend and then it would be packed up and sent to another bridal shop.  There was no way I was going to buy a wedding dress without my mother seeing it. The owner of the store suggested we skype with her, however while having lunch, my sister and I decided my mother should fly from Boston to DC just for the day.

Oh yes I am that crazy and thought it was TOTALLY appropriate to have my mother fly in Sunday morning and out that evening just to see the dress.  After some serious convincing my mother agreed to fly in for the day.  We found a “reasonably” priced ticket and the next day she arrived bright and early to do some dress shopping.  Smartly, she requested that we go to at least one other store so she could have other dresses to compare THE dress too.

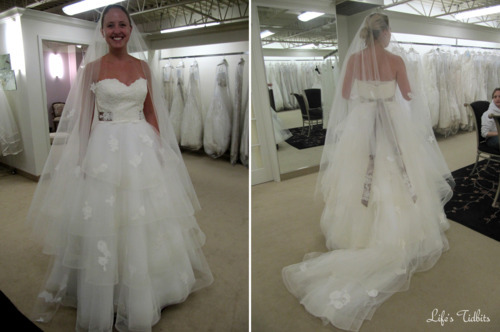
We began at Hannelore’s and I tried on two dresses for her.  The first and the immediate favorite at that store looked like this:

Anne Barge, Style 612

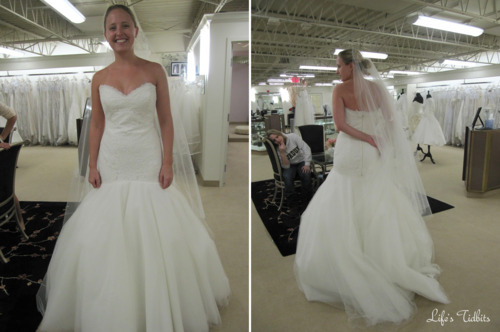
The second, which I had liked the first time, but not loved got cut almost immediately. We quickly realized in pictures you couldn’t see the beautiful lace in the boddus.  It just didn’t “pop” to us.  Here’s the second dress:

Romona Keveza Legends 804 – Look at my sister in the background … how bored does she look. hahahahaha. It was because she knew it wasn’t the right dress!

After taking my measurements for the first dress and pretty much talking myself out of the dress my mother had initially flown in to see we headed to Love Couture.

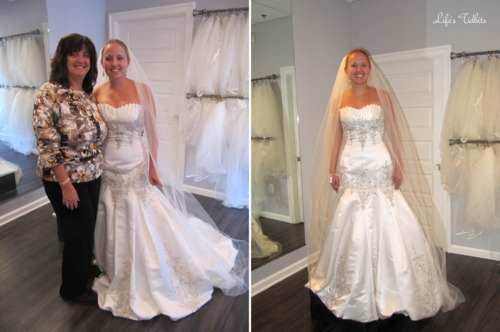
They already had “the” dress as well as one other I had been considering ready for us.  I slipped into the dress and was grinning ear to ear.  As my sister had predicted while we were in Hannelore the Stephen Yearik dress was a better match for the look I was going for.  Here we are trying on the dress at the store:

Stephen Yearick

Two days later the buyers remorse kicked into high gear. I started pulling up the two dresses and comparing/contrasting them. My sister, the MOH, kept telling me I was crazy for doubting my initial decision. I waffled back and forth for the next few months. I started checking out second hand versions of the Anne Barge dress and seeing if I could afford (heck no!!) the second dress I liked as well.

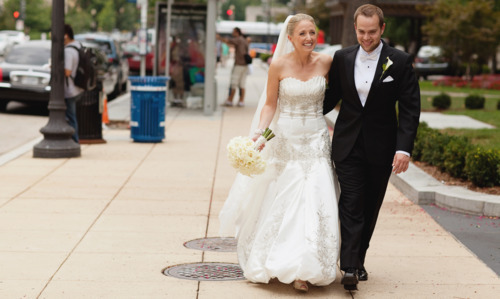
In the end all the buyers remorse was erased when I went to the store to try my dress on the day it came in!  After the alterations, makeup, jewlery and all the other good bridal stuff here’s how it looked on our wedding day:

Photo Credit: Korie Lynn Photography

Thanks for taking a walk down memory lane with me.  Buyers remorse be gone because on the day of our wedding I wouldn’t have wanted to be in any other dress!

Happy Dress Shopping!

Don’t forget to leave your tidbit by commenting below :)

Share

I know I am a bad blogger and I still haven’t told you about how we made our own wedding invitations, but that DIY project was a HUGE undertaking. Honestly, I’m not completely sure how to walk you through the process step by step … YET.  So instead I started thinking maybe I would just begin by sharing our DIY rehearsal dinner invitations.

After determining the location, invite list and all that fun stuff for the rehearsal dinner I decided we (the husband and I) should DIY own rehearsal dinner invites.  We had left over card stock from the wedding invite inserts as well as extra envelopes (from our DIY Calligraphy).  I mean it would have been such a waste not to take advantage of the left over paper materials, right?!?!?! ;)

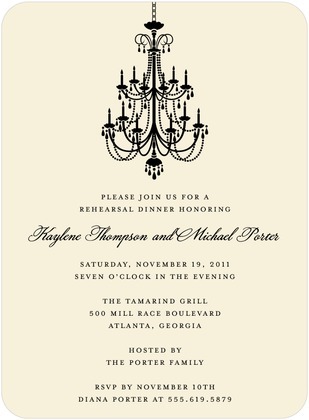
Early on I found Wedding Paper Divas. They have fabulous invitations for various occasions, in fact it is the website we purchased our save the dates from.  I quickly found this rehearsal invitation, which served as my inspiration for our DIY invites.

Image Credit: Wedding Paper Divas

What you need:

Photoshop has a 30 day FREE trail you can download.  We used a 30 day trial to create the initial draft of our wedding invitations. In the end we ended up purchasing Photoshop.  We planned to use it not only for wedding stuff, but also for my budding photography hobby!  If you plan to go the 30 day trial route, make sure to save the final version of your invitation as a PSD, JPG and TIFF file. This will ensure you are able to print the design even after your trail expires.

To ensure we could use some of our left over envelopes, I knew the invitations would need to be 5×7.  Once I had the size I found a free image online of a chandelier and downloaded it. From there I Googled rehearsal dinner text and placed it on the initial version of the invite.  After that it was just a matter of finding a layout we liked as well as fonts.

The majority of the text is in a renaissance font, which is free to download!  Then for our names I used the same font we used on our invitations for our names, again a free font you can download.  I felt using a little of the same font as the wedding invitations tied everything together.

I didn’t take a lot of pictures of the process, which is a bummer, so I can only really describe what I did.  I printed two invites on each piece of card stock and then used my handy dandy paper cutter to make them 5×7. I printed a number of test versions on plain paper before using the card stock.

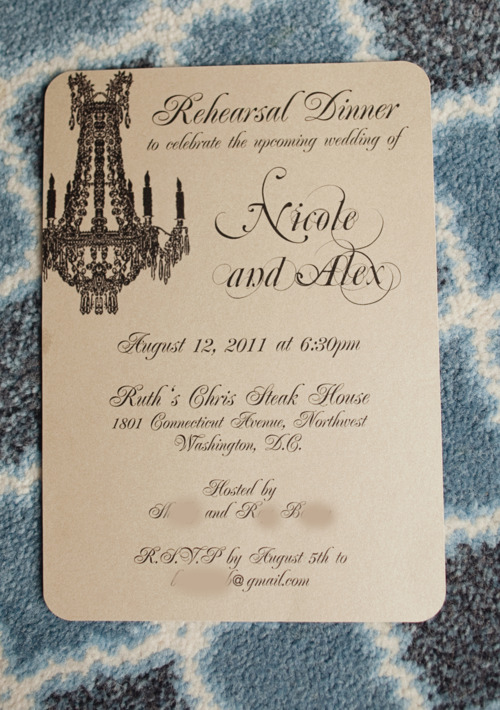
This is one of the test versions, please excuse the crappy blackberry camera shot:

I had printed almost all of the rehearsal dinner invites when I remembered I had purchased a paper rounder punch. I decided to go ahead and use one of my test invites and round the corners to see how it looked.  I ended up loving it and the husband was in agreement.  A bunch of punches later we had rounded edges instead of sharp corners.

Here’s what the rehearsal dinner invitation looked like totally finished:

Here are a couple of extra tips:

  1. SPELL CHECK!
  2. Print test versions on plain white paper before doing a sample on your nice card stock.
  3. Print using High resolution.
  4. Make sure you have enough paper.  You will need extra for test prints as well as if you detect a mistake. Or if like me your ink cartridge starts to die so some invites are better than others.
  5. Start early.  Even though you don’t have to print as many rehearsal dinner invitations as wedding invites (usually) they still take time.  Better not to be up against a deadline.

Happy Planning!

Don’t forget to leave your tidbit by commenting below :)

Share

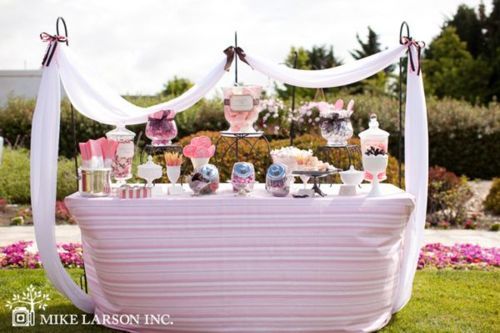
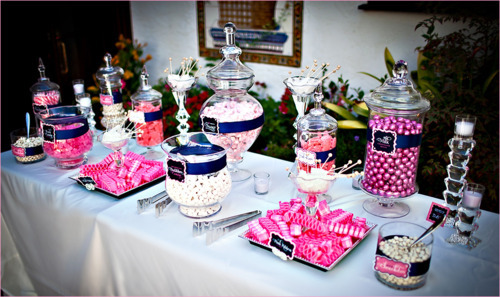
Shortly after getting engaged and reading (too) many wedding blogs I became obsessed with having a Candy Bar/Buffet at our wedding.  Here are two candy buffets that were part of my inspiration:

Wedding Candy Buffet

Found on WeddingBee

Wedding Candy Buffet

Found on Aisle with Style by the Photo is from Hostess Blog.

Best place to buy anthropology jars that I found was Marshall’s.  All the good jars were about $12, which isn’t too crazy.  We went to multiple Marshall’s and waited a couple of months and then went again.  It took a while to compile all the jars, but in the end all the trips were totally worth it.

Other places I found candy jars were Michael’s, Crate and Barrel, Ebay and Craigslist.  9 time out of 10 though Marshall’s had the cheapest and best options.  I would definitely suggest doing some window/online shopping before buying from anywhere.

About 6 weeks before the wedding we purchased all the candy.  That’s not to say I had already picked out the candy months before purchasing it! :)  We went with purple, white and pink candy to go with the color theme of the wedding.  Well sort of, cause pink wasn’t a wedding color … but so many good candies are pink though!

We got the bulk of the candy from Candy Warehouse.  Here is exactly what I purchased:

  • White “Just Married” Sweet Tart Circle Rolls: 5LB Bag
  • Lavender Foiled Milk Chocolate Balls: 5LB Bag
  • Princess Candy Necklaces & Bracelets: 24CT Box x5 (this was too much probably only needed x3)
  • Strawberry & Creme Salt Water Taffy Candy: 3LB Bag x2
  • Green Rind Watermelon Slices: 5LB Bag
  • Haribo Gummi Pink Grapefruit Slices: 5LB Bag

The jelly beans were slightly cheaper at Bulk Candy Store.  Here’s what I ordered:

  • Island Punch Jelly Belly: 5 lbs
  • Coconut Jelly Belly: 5 lbs
  • French Vanilla Jelly Belly: 5 lbs
  • Strawberry Daiquiri Jelly Belly: 5 lbs
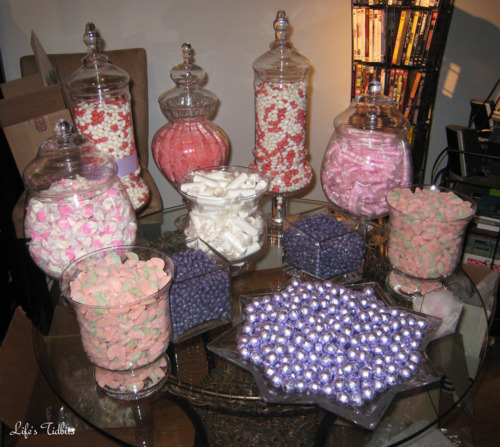
Here is the candy buffet all set up at the house two days before the wedding –

Wedding Candy Buffet | Life's Tidbits

A few small tidbits to consider:

  1. I had ~100 people at the wedding and this was too much candy for the size of our wedding.
  2. If we had provided the “to go” candy boxes at the tables people who missed the candy bar/buffet might have gone to seek it out. This could have meant not so much extra candy after the wedding.
  3. Don’t open the candy until a day or two before the wedding/party as the candy could go stale.
  4. The hotel provided the scoops, which meant we didn’t have to buy any!
  5. Make sure you visit your own candy buffet! We were so busy talking and dancing I didn’t make it by the buffet and I wish I had.
  6. If you are going to make name tags for each type of candy do so ahead of time. I ran out of time the week before our wedding and that detail just didn’t make the cut.
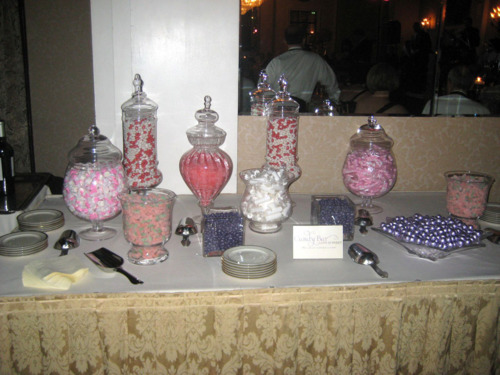
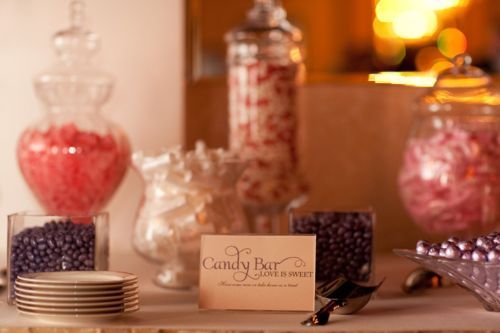
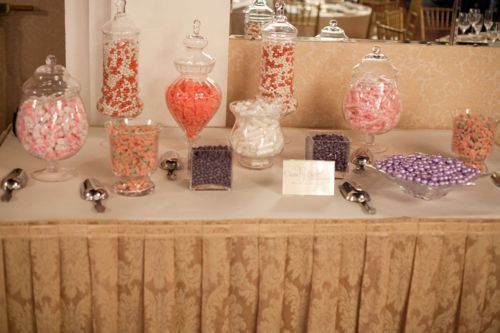
Over all I loved how our candy buffet came out!
Wedding Candy Buffet | Life's Tidbits
Photo Credit: Wedding Guest

Wedding Candy Buffet / Candy Bar / Love it Sweet| Life's Tidbits

Photo Credit: Korie Lynn Photography

Wedding Candy Buffet | Life's Tidbits

Photo Credit: Korie Lynn Photography

I think the candy display was cute and came together how I had envisioned.  I sold all of the candy jars to a bride-to-be in the DC/VA/MD area. It felt so nice to see the HUGE smile on her face as she loaded them into her car … and how relieved she was the search for jars was over.

What extra tidbit would you have added to the candy bar/buffet?  Anyone have tips for other brides?

Happy Planning!

Signiture_Nicole


Don’t forget to leave your tidbit by commenting below :)

Related Posts Plugin for WordPress, Blogger...
Share