Despite having his and her closets in the master bedroom we didn’t have a place to hang our clothes for the first 3 weeks we lived in our new place.

The husband took out the existing rod and shelf from both closets the weekend before we moved in while we were painting the bedroom.  It took some brute force and a little finessing,  but in the end the closet lost it’s “builder” look.

Here’s a helpful video I found one how to pull out builder closets if you have questions. I made the husband watch the video and concurs with the process.

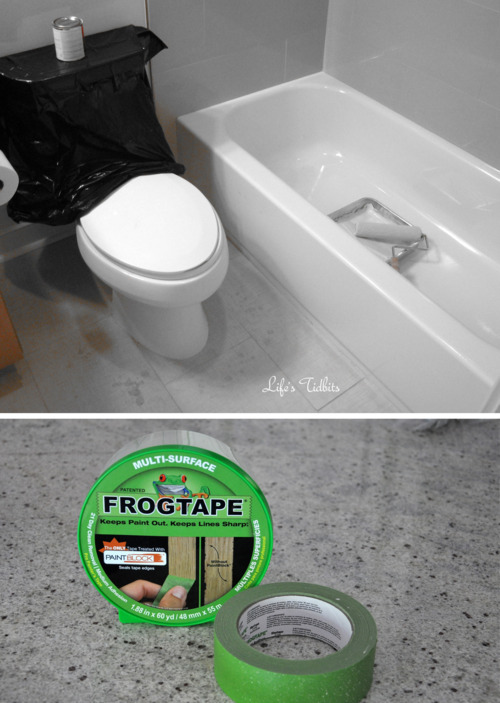
Then we used putty that goes on pink and drys white. This way we knew that it was 100% dry before sanding it down.

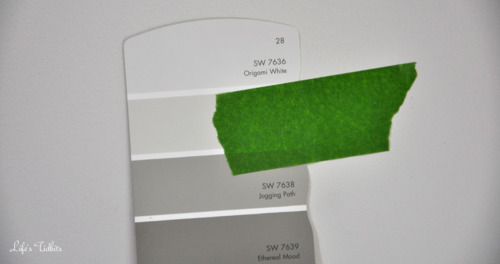
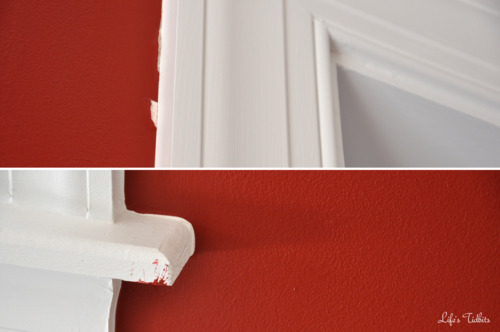
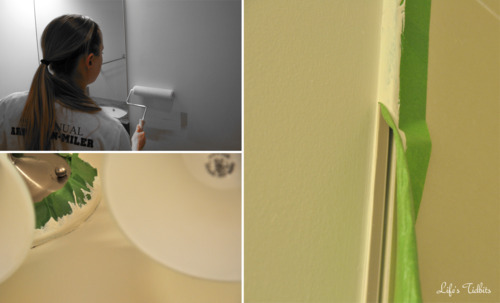
After puttying, letting it dry and then sanding it down we were ready to paint.  We used the Origami White to paint the inside of the closets.  The closets took a lot more paint than I ever would have thought of so we ended up having to buy an extra quart to finish it off. I’m not going to lie, we totally hit the ceiling in a couple places and didn’t bother to touch it up.  I mean really, who looks in your closet, up at the ceiling and then stares looking for slight imperfections – no one, therefore no touch-ups hahaha.

Despite being ready to install our new closet organizers, we hadn’t actually purchased anything.  I considered pulling the trigger on a ClosetMaid and a Rubbermaid closet organizer.  I was having trouble deciding on how to design the closets, which was very much impacting my ability to purchase anything.

Memorial day weekend we FINALLY pulled the trigger and purchased our closet organizers.  After delivery, installation and a little unpacking of the clothes we are all set up with his and her closets!!!

Here’s the thing, my husband’s stuff just doesn’t take up the whole closet.  AND since we don’t have a linen closet, my husband graciously agreed to allow me to put a few additional shelves in his closet for the towels, sheets and extra pillows/blankets.  So of course, back to the store we went to return stuff we didn’t need and purchased a few extra shelves.  Although I wish we had them installed prior to move in, I am absolutely loving our closet organizers!!

His and her closets are complete:

Happy home improvements!

Don’t forget to leave your tidbit by commenting and/or add Life’s Tidbits to your RSS Reader :)

Share

When we toured the condo, we eventually ended up buying, I didn’t notice the cabinets didn’t have hardware on them.  In fact I am not even sure I would have ever noticed they were missing (until we moved in) unless the husband had pointed it out.  At first we assumed the hardware just hadn’t been installed yet; we were wrong.  Apparently the builder purposely didn’t add knobs to the cabinets. In his experience buyers “don’t usually like” the hardware he chooses and therefore all the units in the building come sans knobs in the kitchen.

This missing knobs tidbit also showed up on the report from the home inspector.  The seller agreed to have the hardware installed for us if we purchased and provided the knobs prior to closing.  Knobs were at the very bottom of our to do list in the weeks prior to closing. We had to start packing, work, attend a wedding, travel to NY for a family event and oh so much more. As you can imagine the whole not having hardware in the kitchen didn’t really take precedent.

We had perused knobs at Home Depot, but hadn’t loved anything.  Then the husband found Knobdepot.  Our knobs had to be brushed nickel in order to match the appliances/faucet in the kitchen.  This was kind of nice because it helped us narrow down our choices.  In the end we ended up choosing these.  Modern with a twist {pun intended … hehehehe}.

Since we didn’t get the knobs purchased prior to closing we were either going to have to hire someone to install them or do it ourselves.  My handy husband was pretty convinced he would be able to install the hardware himself.  Our knobs came with a free template, however it wasn’t the right size?!?! I mean really, why send us a free template that is too small for our knobs?  LUCKILY the husband is handy, like I said, and he went ahead and modified the vertical and horizontal template to be usable.

Here’s how they look:

Not so sexy, but extremely effective!

We learned something very important when installing the first knob – drill through the front of the cabinet, not the back. When we drilled from the back to the front there was some splintering on the front of the cabinet :(  Luckily we did the test on a cabinet that isn’t front and center.  Also we added masking tape to the inside of the cabinets to help minimize the splintering on the inside.

Hold the template up to the cabinet door.

Drill a little bit through each of the two holes to make a mark on the cabinet.

Check to make sure the holes are level and then drill through each of the holes.

Screw the knobs onto the cabinet and check that it is level again.  Along the way we made small modifications to the holes to make sure they were level.

After they are all screwed in it looked like this:

I love how the cabinets look.  Since we got use to not having knobs I still find myself grabbing the top of the cabinet to pry it open. I’ve got to start taking advantage of our new bling bling.

Happy home improvements!

Don’t forget to leave your tidbit by commenting below :)

Share

I have already told you about painting a red accent wall in our bedroom.  There were a few pieces of trim to fix, but all in all the accent wall in the bedroom is complete.  Because we had painted some sample paints on two of the three other walls in the room we had to paint the three other walls so they would all be the same color.  Why we didn’t put all samples on one wall to start is beyond me. It would have saved us some serious time to have left those walls as is.  There was builders grade paint already on the walls so we considered doing touch ups to the walls instead of picking a brand new color.  When we went to the Duron store to buy the paint and they told us that color/style only comes in a 5 gallon bucket. That was WAY too much paint and the cost wasn’t so pretty.  Back to the drawing board we went.

While searching for a shade of gray for the living room I had picked up a Sherwin Williams color wheel.  We decided it was as good a place as any to start the search for a white/cream color for the bedroom.  Quickly we realized Origami White (7636) was very similar to the color already on the wall.  It was slightly lighter and had more gray/brown tones and less yellow in it.  We taped the swatch up on the wall for a few days to make sure we liked it.

As the designated paint runner I was off to Sherwin Williams to pick up the paint once we decided to go with Origami White.  I was concerned one gallon wouldn’t be enough paint for the three wall and inside of the closet and the husband was convinced 1 gallon was plenty.  He could tell it was making me nervous so we agreed on buying a gallon and a quart.  This way we had a quart of paint as back up for the closets OR if we mark up the walls while moving in.

I purchased the paint in satin, which is pretty much the same finish as eggshell.  After my last mix up with paint finish I looked up satin vs. eggshell before allowing the SW employee to place my order.  It took me about two hours to paint the edges and three walls in the bedroom. I also managed to put about 3-4 spots on the ceiling when using the roller extension.  Oopsies!

But that wasn’t the only oops that happened while painting the bedroom.  Sophi backed onto the lid of a paint can while trying to rescue her ball from the plastic wrap.  Before I could grab her she promptly ran onto the small patch of hardwood floor that wasn’t covered in plastic.  So we had three little white paw prints on the floor to deal with.

Luckily after allowing the paint to dry on the floor we were able to scratch it off with finger nails.  Looked like nothing had ever happened.  As I pulled off all the tape and threw the plastic on the floor away I started to realize our bedroom was 95% completed!  I grabbed the can of ceiling paint and touched up the couple of spots I had inadvertently painted.  Then I screwed the light switch and outlet plates back on and what do you know it looked like a real room again!!

Here’s the before, during and after:

Although I would like to call the bedroom a wrap we still have a few things left to do.

1.  Remove existing closet shelf/poll, putty/paint sed closet and then install the new closet organizers

2.  Decided upon, purchase and install blinds.

At this point we are 4 days away from move in. I am not convinced we are going to be able to get all that completed before we move in.  Our currently place is only 1/2 packed and the movers arrive Saturday morning at 8am.  We better get a packin’ don’t you think?!?!?!  We are hoping to at least complete demolition on the closets so the dust doesn’t get all over our furniture.  Cross your fingers for us!!

Don’t forget to leave your tidbit by commenting below :)

Share

Chugga chugga Chugga chugga CHOOO CHOOOO!!!! Sorry couldn’t help myself LOL. :)

My initial plan for the bedroom was to have a dark gray accent wall with light gray side walls. I really liked the mock up I did and so did our friends and family.  We went to Home Depot and purchased a few different samples of Glidden paint.  All I can say is paint color looks WAY different on the walls than it does on the sample card or online.

Here is the room mock up I created using Glidden’s website to paint the walls and then I used PhotoShop-ed in add the bedding and my photo from Mexico:

The silver dust color on the side walls turned out to look super purple in the room.  The Seal Gray was pretty, but just not what I was looking for.  I’m not sure what the lighter gray/silver color is on the wall (in the picture below), because the husband chose it at random and we have since thrown the paint card and sample away.  Sorry for the horrible picture. This is what I get for using my old crappy camera.

Feeling discouraged that my gray accent wall wasn’t turning out as I had hoped a friend offered to help us narrow down color choices.  We got a gray duvet cover for our wedding and considering it is the ONLY duvet cover we have agreed upon in 2 years we weren’t willing to part with it.  Therefore the bedroom color had to compliment gray. Lucky for us gray is pretty neutral! Our friend suggested we do a red wall instead of the gray. I was sold on the idea pretty quickly.

The husband and I had been considering red as our accent color in the living/dining room after finding this Pottery Barn rug.  Luckily my husband has purchased a rug sample so it was easy to find a red paint swatch that closely matched the rug, BM Confederate Red (2090-20).  During one of my many trips to the paint store I purchased a sample of this paint.  It looked nice on the wall, but felt like it had too many pink undertones.  I remember my mother had said her friend had recently done a red accent wall in her living room and decided to ask my mom to ask her friend for the paint color.  Enter HOT TAMALE! It’s a C2 paint, which is suppose to be thick enough to only have to do one coat of paint.

Anyways we slapped C052, aka hot tamale, paint sample up on the wall and we had a winner!  Since the red rug didn’t match the red paint we decided to say goodbye to rug.  We are now thinking a gray rug with red accents around the room to tie everything together.  Hopefully it turns out well!

With the walls taped and the floors covered I was ready to begin painting.  Sophi supervised the whole thing. :)

I’m proud to say I pretty much painted this whole wall myself.  One thing I quickly learned while painting the red wall was to do the trim first.  Painting the trim first with a brush and then going over it (or close to it) with the roller made it blend better. When I rolled and then did the trip the brush strokes stood out more.

Although C2 paint is supposed to only need one coat we decided to do two. As it was my first time really painting as well as wanting it to look perfect the second coat made a world of difference.  I was very methodical about the second coat too and started at the left and worked my way right instead of starting in the middle as I did with the first coat.

When I removed the tape I noticed the window frame had some red on it … oops. I also noticed the tape pulled up a few small pieces of the paint around the edges.

Luckily my husband has a steady hand and went ahead and touched up the places where the paint lifted from the wall.  Now all I need to do is touch up the window frame.  Two mistakes, not too bad if I do say so myself.

Here’s the before and after of our red hot tamale wall:

I can’t wait to paint the other three walls a creamy white and then we can call the master bedroom a wrap on the painting front.  I’m on the hunt for some nice little red accents to put in the room.

What do you think of our red wall?

Happy painting!

Don’t forget to leave your tidbit by commenting below :)

Share

Before buying our condo I had never painted any of the places I had rented.  The only thing I remember painting was a fake wall my roommate and I had (frat boys) put up in the living room of our one bedroom apartment to make it into a two bedroom.  Funny thing about that, my friend and I only painted the part of the wall that wasn’t covered by the couch … can you say college standards?! :)

My husband on the other hand has painted before and was good about giving me tips.  He said to only put about an inch of paint into the pan and to make sure the whole roller has paint on it before painting the wall.  Then there was the tip to roll slowly at first to avoid excess paint spraying on things not covered or taped.  These were all great tips!  The one thing neither of us knew was what kind of paint finish is suggested for different rooms.

The counter top in the bathroom has green tones to it so I knew I wanted to go with a green paint in the guest bathroom.  Here’s the first green we considered, but it was too bright for the bathroom:

After slapping two more greens up on the wall there was a clear winner.  I seemed to have missed taking a picture of the other two colors we put on the wall.  We decided on Benjamin Moore Old Prairie (2143-50).  A whole gallon wasn’t necessary for a small bathroom so I was to buy a half gallon (two quarts really since a half gallon wasn’t an option at this particular store).  The first Saturday after becoming homeowners my husband was busy taping and prepping the condo to be painted.  Therefore I was on go to the store/run errands duty. Off I went to the store feeling really good about what I needed to buy.

The man at the store was less than helpful. He started by trying to up-sell me and I got completely confused on what I needed/wanted.  Eventually he took my order for the paint and then asked what finish I wanted. I said “ummmm well ….” to which he handed me a finish card to look at. I immediately remembered my friend saying samples come in flat, but get eggshell when you actually paint.  Done and done, paint mixed and purchased.

While I was gone my husband taped the bathroom and got it ready to be painted.

When I got home we painted the bathroom our new light green color.  On my next trip that same day to the same paint store to buy paint for the master bedroom, I overheard someone talking about which finish to use for the different rooms.  Keep in mind this information wasn’t on the finish card and the guy helping me didn’t offer up any narrative as to what finish to use.  As I hear the words bathroom and semi-gloss in the same sentence I start to freak out.  Have we just painted the bathroom the with the wrong finish??

When I got back to the new place I shared this tidbit with my husband. Out comes the iphone and Googling begins. Sure enough we painted the bathroom with the wrong finish.  We debated if we should spend the money and the time to repaint the bathroom the same color but in semi-gloss or just go with what we already had on the wall.

In the end back to the paint store we went to purchase a quart of the semi-gloss.  Apparently even a 1/2 gallon was too much paint for the guest bathroom.  Since the bathroom was still taped we decided it was best to repaint the room now.  Doing it right now would save us the hassle of repainting the room in 6 months if the eggshell wasn’t holding up well.

The repainting took less time since there was already a base coat on the walls.  In the end I actually liked the look of the semi-gloss better than the eggshell in the bathroom.  I’m SOOO glad we took the time (and money) to correct the painting finish error.

The husband did a great job on the taping and when we pulled the tap off the lines looked fantastic!

Interested in learning about what paint finish is suggested for each room? Click here for details about paint finishes. This website would have come in handy if we had done some research before slapping paint up on the wall!!  Lesson learned. :)

Guest bathroom painting completed … master bedroom, master bathroom and living/dining room as well as hallways to go.  Painting is time consuming, but the place is starting to have a more homey feel to it!!  Now we just need a shower curtain, mat and accessories and the guest bath will be complete.

Happy painting!

Have you had any similar painting mishaps?

Don’t forget to leave your tidbit by commenting below :)

Related Posts Plugin for WordPress, Blogger...
Share