My friend invited us over for Sunday football and was already planning on making all the classic football foods.  After sitting on the couch debating on what I should bring, I decided on hummus. It is healthy, yummy and I can snack on it for the whole game without getting sick of it. :)

I took a number of different recipes from online and came up with this yummolicious hummus!!  It is a prefect party item, appetizer or food to bring to a football viewing.

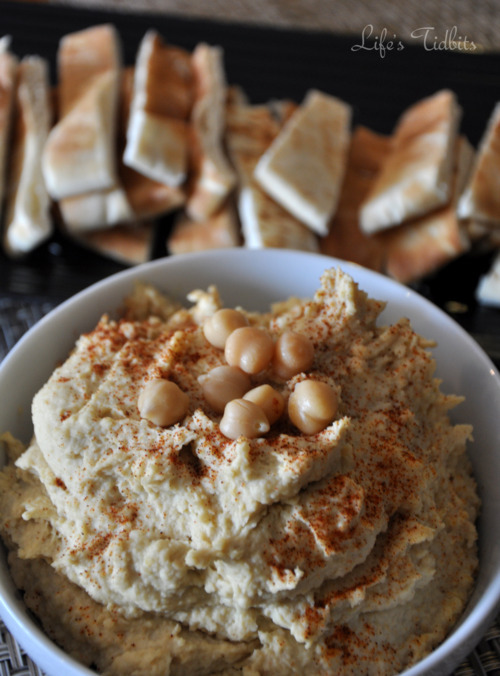
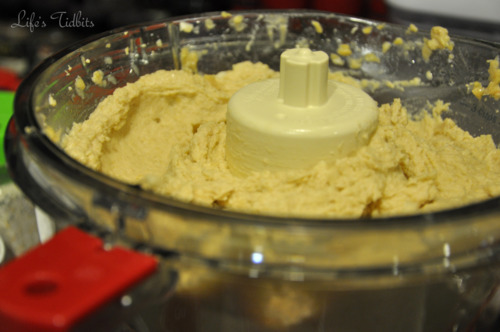
Here’s how the hummus comes out and it takes less than 15 minutes to make!
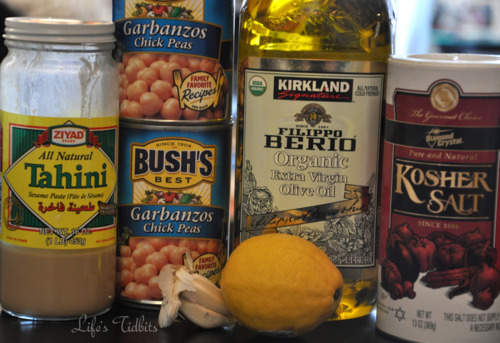
Ingredients:

2-3 garlic cloves
2 cans chickpeas, drained, liquid reserved (save a couple of chickpeas for garnishing)
1 teaspoon kosher salt
1/3 cup tahini (sesame paste)
2 lemons squeezed
2 tablespoons liquid from the chickpeas
Olive Oil

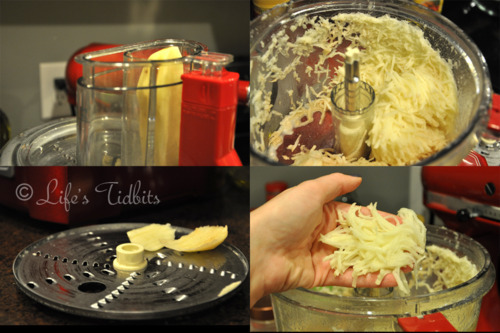
Put all the ingredients in the food processor (except the olive oil).  Start processing and slowly add 1-2 tablespoons of olive oil at a time.  Unfortunately when I made the hummus this afternoon I eye balled the olive oil until it looked/tasted right.  If you’ve purchased hummus from the store or ordered it at dinner you will have no problem with assessing if you’ve added enough olive oil.

Once it is done place it in a bowl and refrigerate for 15 minutes or more.  The hummus can be served chilled or at room temperature.  It tastes great with pita bread, carrots, chips or really any vegetable.

Add a little paprika and the chickpeas you reserved as a garnish.  You can also add a little extra olive oil on top if desired.

Happy Cooking!!

Share

Brrrrr it’s cold out there and today was the first snow fall of the year!!!

Cold weather = chili night at our house and to be specific turkey chili!  My husband swears he’s going to be made of turkey, because of how many turkey based meals I make. LOL. He cracks me up.

Now I’m not saying by any means that I don’t like beef, but in things like chili using turkey or beef doesn’t make a difference to me.  Turkey is lower in fat so I often use it instead of beef.  You can totally use beef if that’s your preference with this recipe.  Either way it will taste great … in my humble opinion. :)

**This recipe was updated on November 4, 2014**

Ingredients:

1.25 pounds ground turkey
1 can chili beans in medium spicy sauce (not drained)
1 can dark red kidney beans (drained)
1 can fire roasted diced tomatoes (with juice)
1 can tomato paste
1 large onion (chopped)
1 red bell peppers (seeded  &  chopped)
⅓ jalapeno pepper (seeded & minced – use less if you don’t like things spicy)
4-6 cloves or 1 tablespoon garlic (minced)
½ cup beer (or substitute in water)
2 tablespoons chili powder
1 tablespoon Worcestershire sauce
½ tablespoon dried oregano
1 teaspoons ground cumin
1 teaspoons hot sauce
1 teaspoon salt
½ teaspoon ground black pepper
⅛ teaspoon cayenne pepper (or less to taste)
½ teaspoon paprika

Chop the red pepper and drop it into a big enough pot to hold all of chili.   I like to add a little vegetable oil to make the veges soften quicker.  Then chop your jalapeno, garlic and onion and drop those in as well.  Saute until they are tender.

In a pan over medium-high heat ground turkey.  Break into small pieces and cook until browned. Drain off any excess fat.

Once the vegetables are cooked add the turkey (or beef) to the big pot.  Next, add in Worcestershire sauce, hot sauce, and beer (I usually use water and to me it tastes the same).  Then add chili beans (with the sauce), kidney beans, fire roasted tomatoes and tomato paste.

Season with chili powder, oregano, cumin, salt, pepper, cayenne pepper, and paprika. Mix well. Cover and simmer for 1/2 hour stirring occasionally.

Makes 6 servings.  If you have left overs it makes for a fabulous lunch the next day or later in the week!

I served it with homemade corn bread and it was YUMMY!

Happy Eating!

If you enjoyed this post, please add your tidbit by commenting below.  Don’t forget you can follow us on PinterestInstagramFacebook and Twitter.

Share

This Christmas we traveled to Kansas City, MO to spend the holiday with Alex’s family.  There is no ambient light and absolutely no “city” noise, which is a nice change of pace from DC.  I’m not a country kind of gal, but I love our little mini vacations on the farm.

First and foremost here is my favorite picture from the weekend! We put Sophi on the barrels of hay and the farm cat (Kitty) jumped up for the perfect Christmas Card shot.

Here are the other highlights from our Xmas break …

Santa’s Whiskers Cookies


YUMMO and let me tell you I’ve had far too many cookies this week.  They are kind of addictive and I just adore how they have the holiday colors in them.  Besides the cookies I made a cheese cake and my MIL made pumpkin bars so there is no lack of sweets in this house to choose from.

The Farm Pictures


And of course it wouldn’t be Christmas without the tree and presents!!

I hope you and yours had a fabulous holiday weekend.

Happy Christmas!!

Share

Happy Hanukkah (or Chanukah depending on your spelling preference)!!!

This year my friend who usually hosts a Hanukkah party decided to go on a vacation with her sister and mom.  I mean really how dare she go away without providing me with potato latkes before she left. =)  So this meant I would have to make my own potato latkes for the first time ever.

This recipe is super easy and if you have a food processor / Cuisinart it is like a hop skip and a jump to the frying pan.

Ingredients:

2lbs (~3 large potatoes)
1 medium onion
2 eggs
1 tsp salt
2 tablespoons flour
vegetable oil

You will also need apple sauce and sour cream to serve with your potato latkes, and I guess if you are my husband then hot sauce should be on the table as well.  Hot sauce is new one for me and I would say skip it, but he insists it tastes good.

Using a food processor or a box grater shred the potatoes and onions. The food processor saved me a ton of time and makes it so easy!  I got to use one of the attachments for the first time, which is always exciting (it’s the small things, right?!).

Transfer them to a colander and squeeze dry. Mix the potatoes and onions with the eggs, flour and salt.

In a skillet, heat 1/4 inch of oil. Drop about four tablespoons for the mixture into the skillet and press lightly to flatten them. Cook over moderately high heat, turning once, until browned and a little crispy. It should be about 6 minutes.

I found that a fish spatula worked really well for flipping these babies and not messing them up.  Just randomly grabbed it, but thought I should pass along the tip nonetheless.  Remove from skillet and place the latkes on paper towels to drain the oil.  It makes about 12 latkes.  And take a look … Voila!

Potato Latkes Recipe, holiday recipe, hanukkah | Life's Tidbits

MAKE AHEAD: The potato latkes can be at room temperature for up to 3 hours. Reheat on a baking sheet in a 350° oven before serving. If you plan to reheat them remember that they cook a little extra in the oven so don’t over fry them.

Just writing this blog makes me want to go reheat the extra latkes and eat them!  Anyways put some sour cream (I prefer light as it is less fat but still tastes great) and apple sauce on the table and serve.

Potato Latkes Recipe serve with a side of apple sauce and sour cream, holiday recipe, hanukkah | Life's Tidbits

And seriously how cute is that double serving bowl?  Thank you wedding guest and Crate and Barrel’s Registry.

Happy cooking!

signiture_nicole


Share

My life is a compilation of the small things, tidbits, that day to day, week to week, and year to year make me … well me!  I love photography, cooking, hanging out with friends and most recently wedding DIY projects … oh and course my little dog, Sophi!!

I was in part inspired to start this blog by my recent wedding, but it’s more than that.  I love sharing recipes, DIY tips, and more with my friends, coworkers and family.  Not to mention all the fabulous stuff they share with me!!  My girlfriends and I instituted a monthly wine and cheese night.  It is a nice way for us all to catch up on what’s been going on in our lives.  At each girl’s night the topics are different.  From food, traveling, books and party planning to babies, decorating and renting or buying a home … everyone has their own tidbit to share.  Life’s Tidbits is a way to share all these fun and useful tips and ideas with a broader audience.

Enjoy … and don’t forget to share your life’s tidbits with us along the way. :)

Related Posts Plugin for WordPress, Blogger...
Share