My friend Kia threw her son a first birthday party a few weeks back.  The party was decked out with all sorts of details and DIY projects.  As co-owner of Baker’s Bliss she also made all her own cupcakes for the party!  Party details as told by Kia…

For my son’s 1st Birthday I wanted to do something different and something fun.  Hopefully, along the lines of cost effective as well.  I looked through a variety of themes of things to do and most of them felt too kiddy.  As every parent knows the first birthday party is more for the adults than the kids and so I wanted a fun theme that all ages could enjoy.   I searched the internet high and low and ultimately fell in love with the posts I had seen from different moms who had decided on the “one year in a flash” theme.

I didn’t have a lot of time to put the party together being a full time mom of 2 plus my full time job left me with not that much time to put the grandiose party on that I wanted too.  However, my bestie and business partner Rebecca was in town to save the day.   And so began the party planning….

First, I made a list of what I wanted to do.  It was hard to come up with this list because I really wanted to do all the ideas I had seen on the internet.  They ranged from photo booths and custom chalkboards to custom banners and cupcake stands.  All of which I thought was ridiculously creative and cute, but I had to be realistic.  I really had about 3 days and unlike most of the other party planners I had intended on making my own cupcakes because that’s just what I do!  So these are the things I decided I was going to do for the party.

Decorations:

  • Custom Banner (What better way to say you are 1 then a year of pictures to remind you)
  • Custom Cupcake Toppers
  • High Chair Banner
  • Balloon Display
  • Photo Booth
  • Custom Thank you Cards
  • Custom Water Bottles

Food:

  • Dessert Table complete with custom chocolate covered Oreos in the theme colors and “camera” sugar cookies.
  • Chocolate Cupcakes with Vanilla Bean Buttercream
  • Vanilla Bean cupcakes with Vanilla Bean Buttercream
  • Pigs in a blanket for the kids
  • Veggie Tray
  • Fried Chicken
  • Queso Dip
  • Chips

This all seemed pretty overwhelming so I ended up ditching the Photo Booth.  I simply just didn’t have the time or the energy given the list of other things that had to get accomplished.

For the Banner, Thank You Cards and Cake Toppers I needed photos!  It was already Wednesday and the party was Saturday so I had to come up with the photo digging through all my digital memorabilia over the last year and get them printed and ready really by Thursday.  CVS photo online to the rescue!  I uploaded the pictures and picked them up at the CVS down the street from me the next morning and it was only .19 cents a picture!   This really came out very cost effective since in addition to the 12 pictures I needed 24 cupcake toppers and 20 thank you cards.

Here’s how the banner came out:


Here are the Thank You Cards:

And the Cupcake Toppers:

Here’s how the dessert table turned out:

You can see my nice balloon display courtesy of Party City.

Admittedly, most of the food items I purchased them from the local super market.  The Fried Chicken was purchased the hubby and then he made the veggie tray and queso dip.  I made the pigs in a blanket and here is what the food table looked like.  The table display was done by my friend Monique!

The chocolate covered Oreos were a big hit and proudly displayed on the right and the custom water bottles on the left.  After all the work it all turned out great.  We all had an amazing time.  I hope you enjoy the pictures and the ideas.  It was a great party!

Check out the Baker’s Bliss website or like them on Facebook.  Thank you Kia for stopping by and sharing your party tidbits with us!!

Happy Party Planning!

Share

I don’t know why, but back in February I became slightly obsessed with making red velvet cupcakes.  I wanted to make them for my 30th birthday, however my husband told me cooking for my own birthday celebration was a no-no! :)  Little did I know he had already purchased my favorite cake vanilla on vanilla.  Plain Jane over here, but I do spice things up from time to time.

I’ve heard a ton of stories about red velvet cupcakes ending up too dry so I was weary of picking a recipe to follow.  I ended up referencing the follow recipes which can be found here (primarily used), here and here.

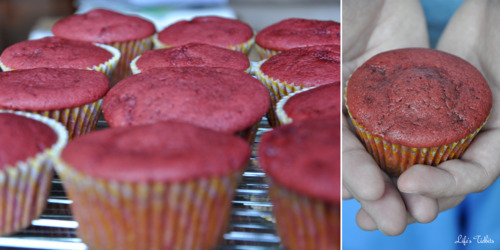
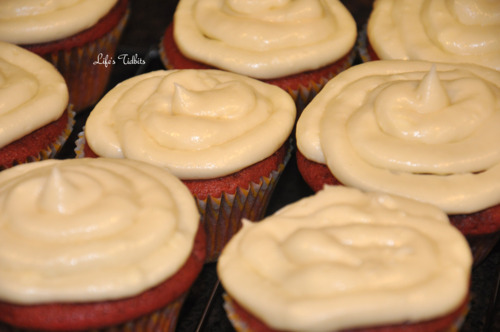
For my first try at these somewhat finicky cupcakes they turned out great! My husband tried the batter and loved it. Then talked about how great the house smelt the whole time they cooked.  He’s my designated frosting checker and gave the A-OK on that little number as well.  In the end the final cream cheese frosting on a red velvet cupcake was a success in our house tonight!

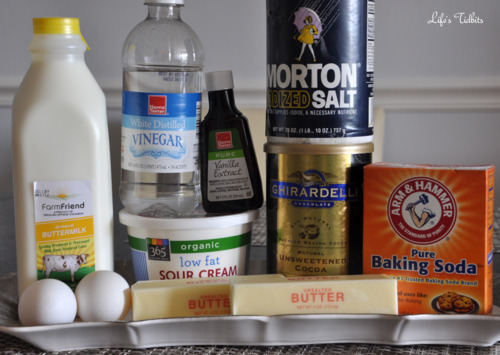
What you will need for the cupcakes:

  • 1 cup (2 sticks) unsalted butter, softened
  • 1 1/2 cups sugar
  • 2 eggs
  • 1/4 cup (2 oz) red food coloring
  • 1/4 cup unsweetened cocoa powder
  • 2 1/2 cups all-purpose flour
  • 1 tsp salt
  • 1 tsp baking soda
  • 2 tsp vanilla
  • 1 cup buttermilk
  • 1/2 cup sour cream
  • 1 Tbsp white vinegar

NOTE:  3 tbsp of coco powder is equal to about 1/4 cup – in case you are referencing other recipes like I did.

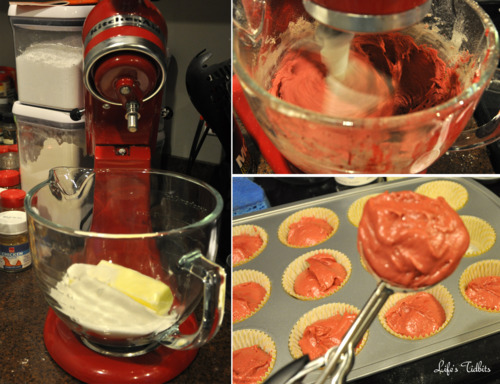
Preheat oven to 350. Line muffin tin with baking liners.

Cream butter and sugar on medium-high for two minutes. Mix in one egg at a time, beating after each addition.

Combine food coloring and cocoa powder to bowl. Watch out for your clothes! I got food coloring all over one of my favorite shirts … pout!  Turn the mixer to low and add to the butter/sugar/egg mixture until just incorporated and then beat on medium for 4 minutes.

Sift together the flours, salt, and baking soda and set aside. Stir buttermilk and vanilla together.

Add dry ingredients to the bowl in three batches, alternately with the buttermilk in two batches, starting and ending with the dry ingredients. Beat on medium until just combined.

Add sour cream and vinegar and beat on low until combined.

Fill muffin cups 3/4 full and bake for 20-30 minutes.  Check the cupcakes at about 15 minutes with a toothpick to see how they are coming along.  Let cool on a wire rack or in the pan.

While the cupcakes are cooking or cooling make your frosting.

What’s needed for the frosting:

  • 16 oz cream cheese, softened
  • 10 Tbsp butter, softened
  • 2 tsp vanilla
  • 3 cups powdered sugar, sifted

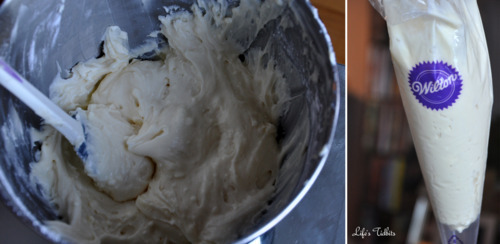
Combine the cream cream cheese, butter, and vanilla in the mixer at med speed.  Add the powdered sugar to the bowl in small batches, while beating on low.  Be careful not to add too much or it was dust you and the counters with sugar as it combines. :) Once fully combined beat on high until desired consistency is reached.

For a stiffer icing, add more powdered sugar.  If needed add a little milk to make the icing softer (you shouldn’t need to do this).

Put your icing into an icing bag and cut off the tip of the bag.

Apply the icing in circles from the outside in.  You should have some frosting left over.  It’s a little too much frosting for 24 cupcakes.

Happy Cooking!

Do you have any tips on making red velvet cupcakes?

Don’t forget to leave your tidbit by commenting below :)

Share

I planned a small/intimate surprise birthday party for my husband turning 30.  And let me tell you he was SHOCKED when he walked in the front door.  I decided early on that I wanted the party to be beer themed, which clearly meant the cake needed to go with the theme.  I was very inspired by a bottle cap cake I found on a blog.

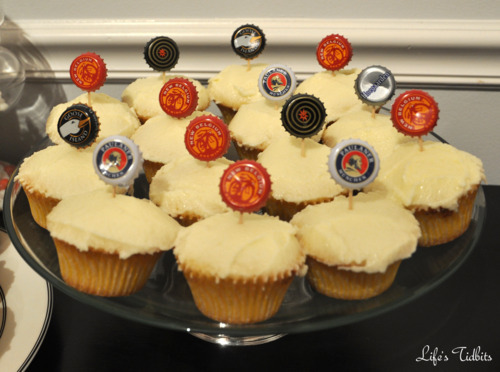
Unfortunately when it came time to making the cake I didn’t have enough time to make fondant.  So I went with option B.  Swiching from a cake to cupcakes. I mean cupcakes are in anyways so win!  Then I made made little bottle cap decorations for each of the cupcakes.  They are super easy to make.  AND how cute are these???

What you need:

Toothpicks
Glue
Beer Bottle Caps

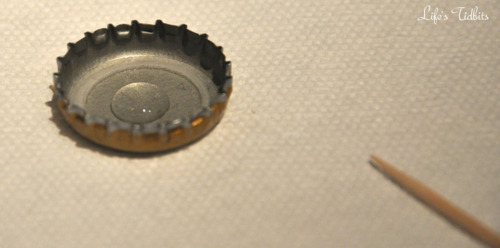
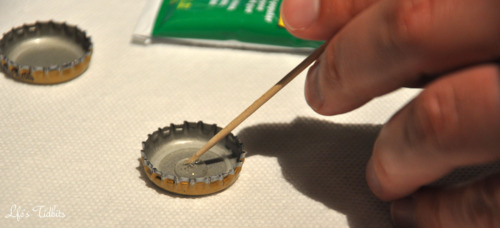
Place a small dot of your duco cement in the center of the bottle cap. Let it dry for 30 seconds or so.

Place the toothpick at an angle into the glue dot.  Roll the toothpicks in the glue a little.  Then hold it in place. Unlike my husband try to put the toothpick at an angle and against the bottle cap edge.

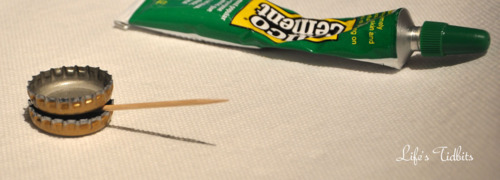
Instead of holding the toothpick while it drys, which takes FOREVER there’s a better option! This took me a while to figure out, but in the end it was a life saver.  Put a second bottle cap on top of the bottle cap/toothpick like so …

Let dry for at least 15 minutes.  The longer the better and depending on the glue you use they will dry at slower or faster rate than mine did.  Then stick it into the cupcake and away you go.  I think it would have been nice to have a few more different types of beer bottle caps, but over all I am very pleased with how they turned out!  Check out the little display:

The color theme of the surprise party was yellow and chocolate brown.  The cupcake liners had yellow stripes on them.  You can find them here and they are pretty cheap and come in a lot of different colors.

Remember how much I wanted to use barbershop straws again? I got them for the surprise party!!  The other small decoration included brown and yellow balloons.

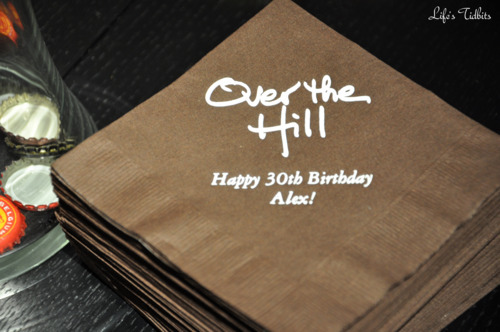
Oh and one more fun little detail for the party … custom napkins!  I had wanted to do custom napkins for our wedding, but it didn’t work out. I would never plan another party without custom napkins.  I love how they turned out!!

Surprise parties are so much fun and all the little tidbits and extra details all the difference in making the party look so cute.  :)

Happy DIY and party planning!

Don’t forget to leave your tidbit by commenting below :)

Related Posts Plugin for WordPress, Blogger...
Share