Admission – I am a sweetaholic!  Always have been and probably always will be.  I’m starting to believe Jellybean, like her mommy-to-be, has a wicked sweet tooth as well.  Yes, wicked … I am from Massachusetts and wicked is an adjective, promise!  I’ve been tried out a lot of new baked good recipes over the last couple of months.  Two of my favorites are classic brownies from Smitten Kitchen and white chocolate brownies from Bake or Break.

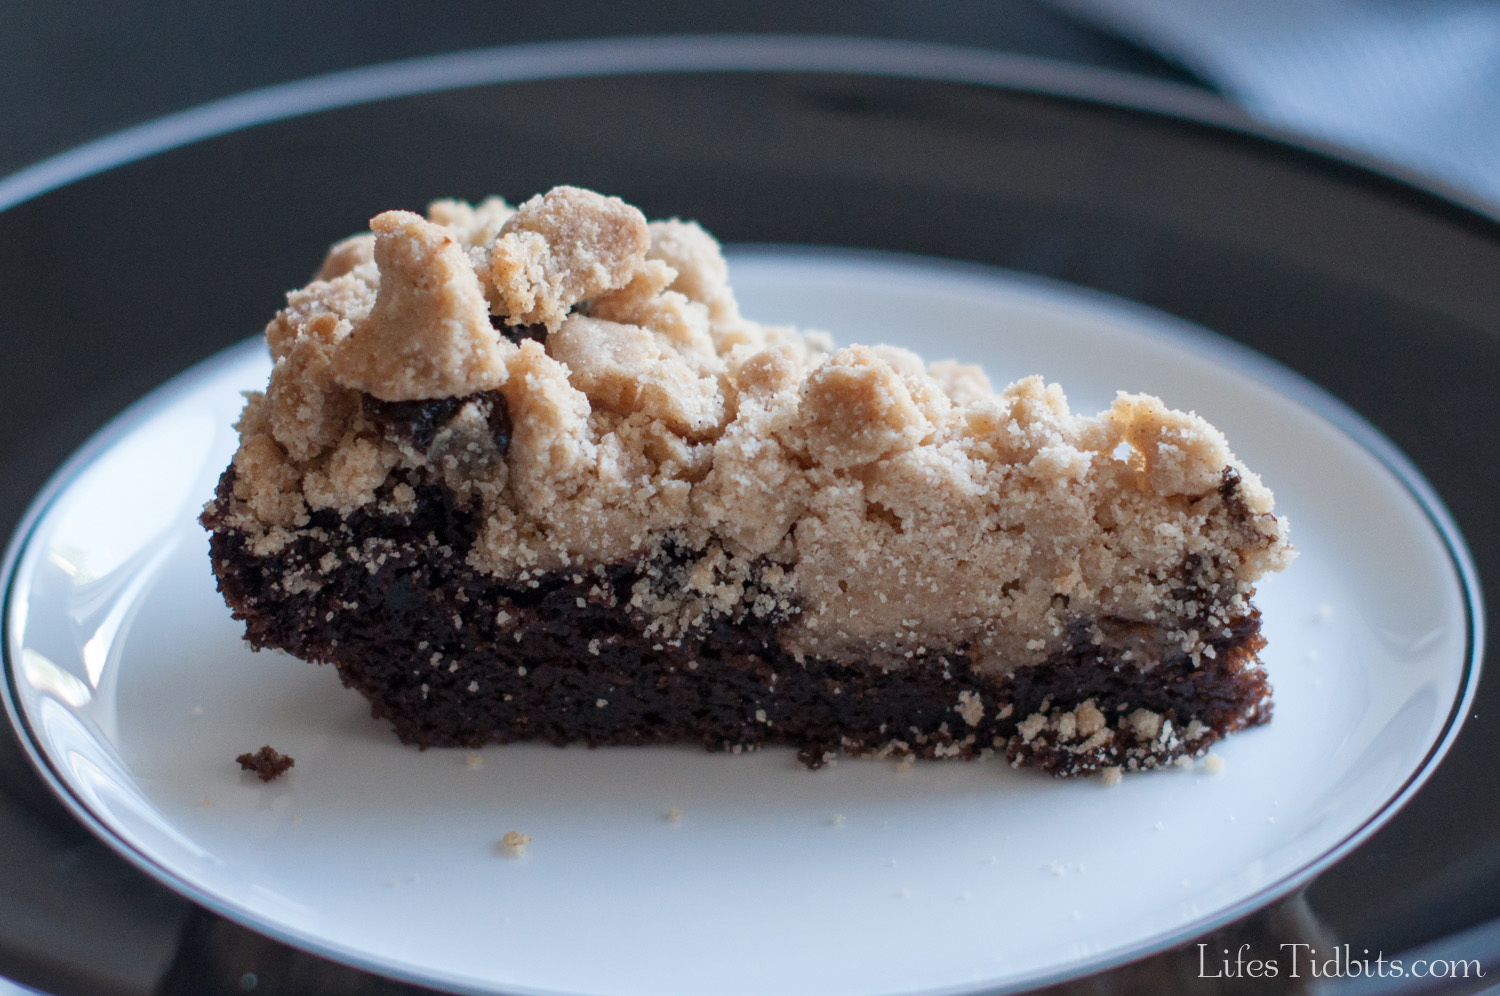
Recently I’ve been looking for new bloggers to follow when I stumbled upon Tin’a Chic Corner.  The chocolate crumb cake recipe immediately grabbed my attention.  Last weekend the husbands were away for a boys “football” weekend so the girls and I decided to do a dinner/game night!  I figured it was the perfect time to give this new recipe a whirl.

chocolatecrumbcake_slice

Ingredients Needed:

  • white sugar
  • dark brown sugar (I used light brown sugar since that’s what I had in the cabinet)
  • ground cinnamon
  • salt
  • butter
  • all-purpose
  • unsweetened cocoa powder
  • baking powder
  • baking soda
  • egg
  • skim milk (I substituted 2%)
  • oil (I think vegetable … at least that’s what I used)
  • vanilla extract
  • boiling water
  • miniature chocolate chips (totally forgot to put these on the cake and it was still delicious!)

Get the recipe and directions from Tina’s Chic Corner here.

chocolatecrumbcake_ingredients

chocolatecrumbcake

chocolatecrumbcake_piece

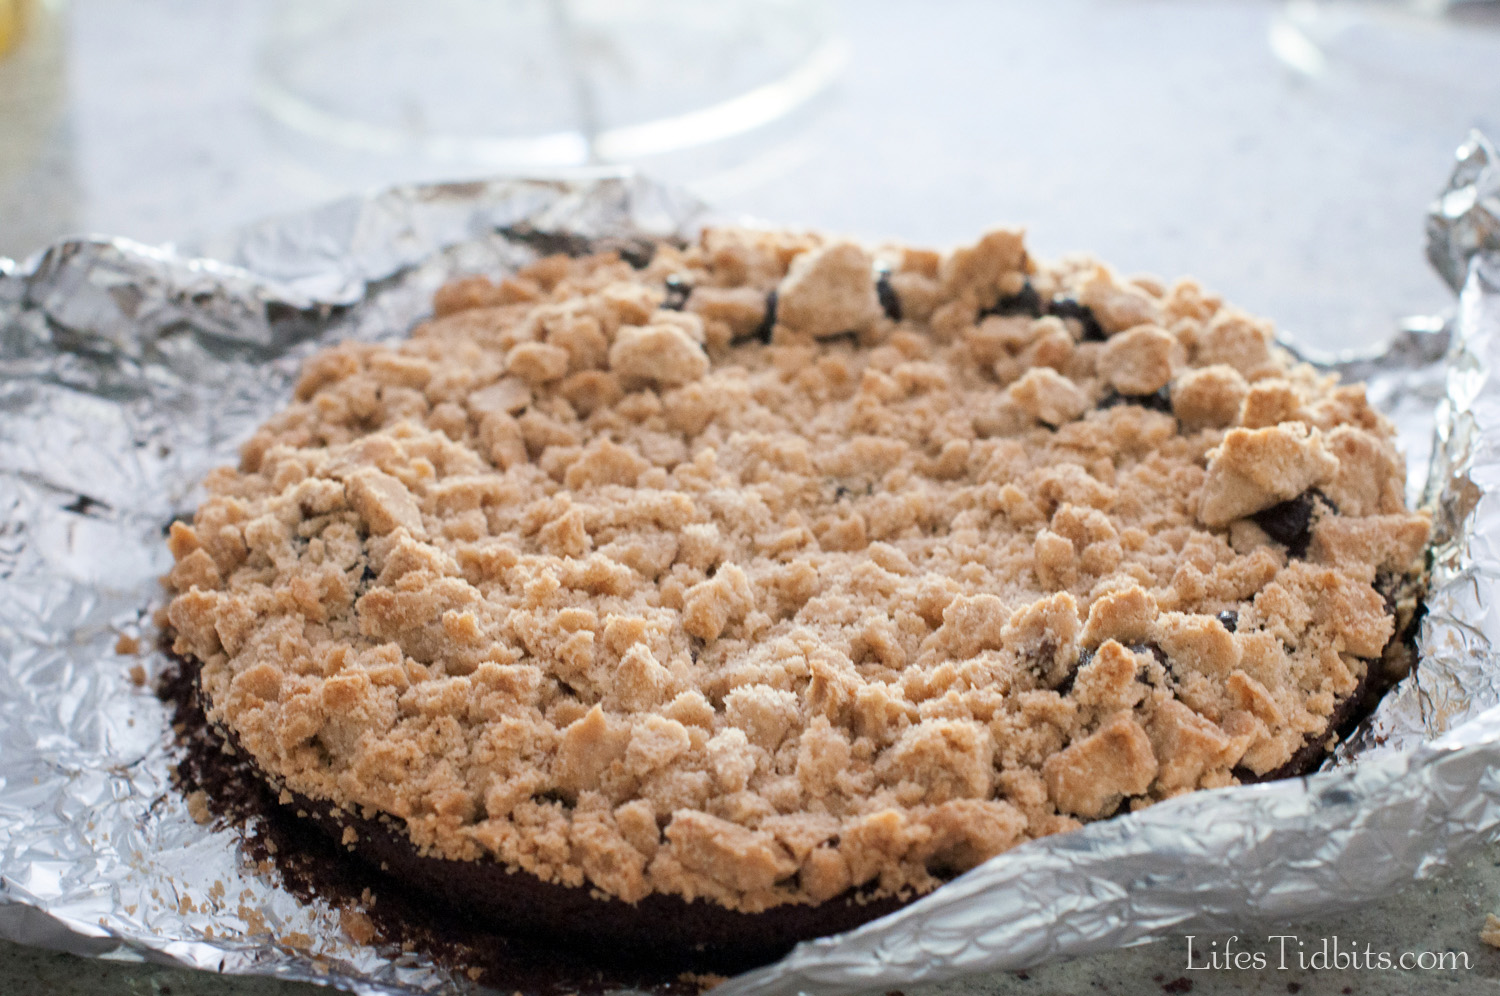
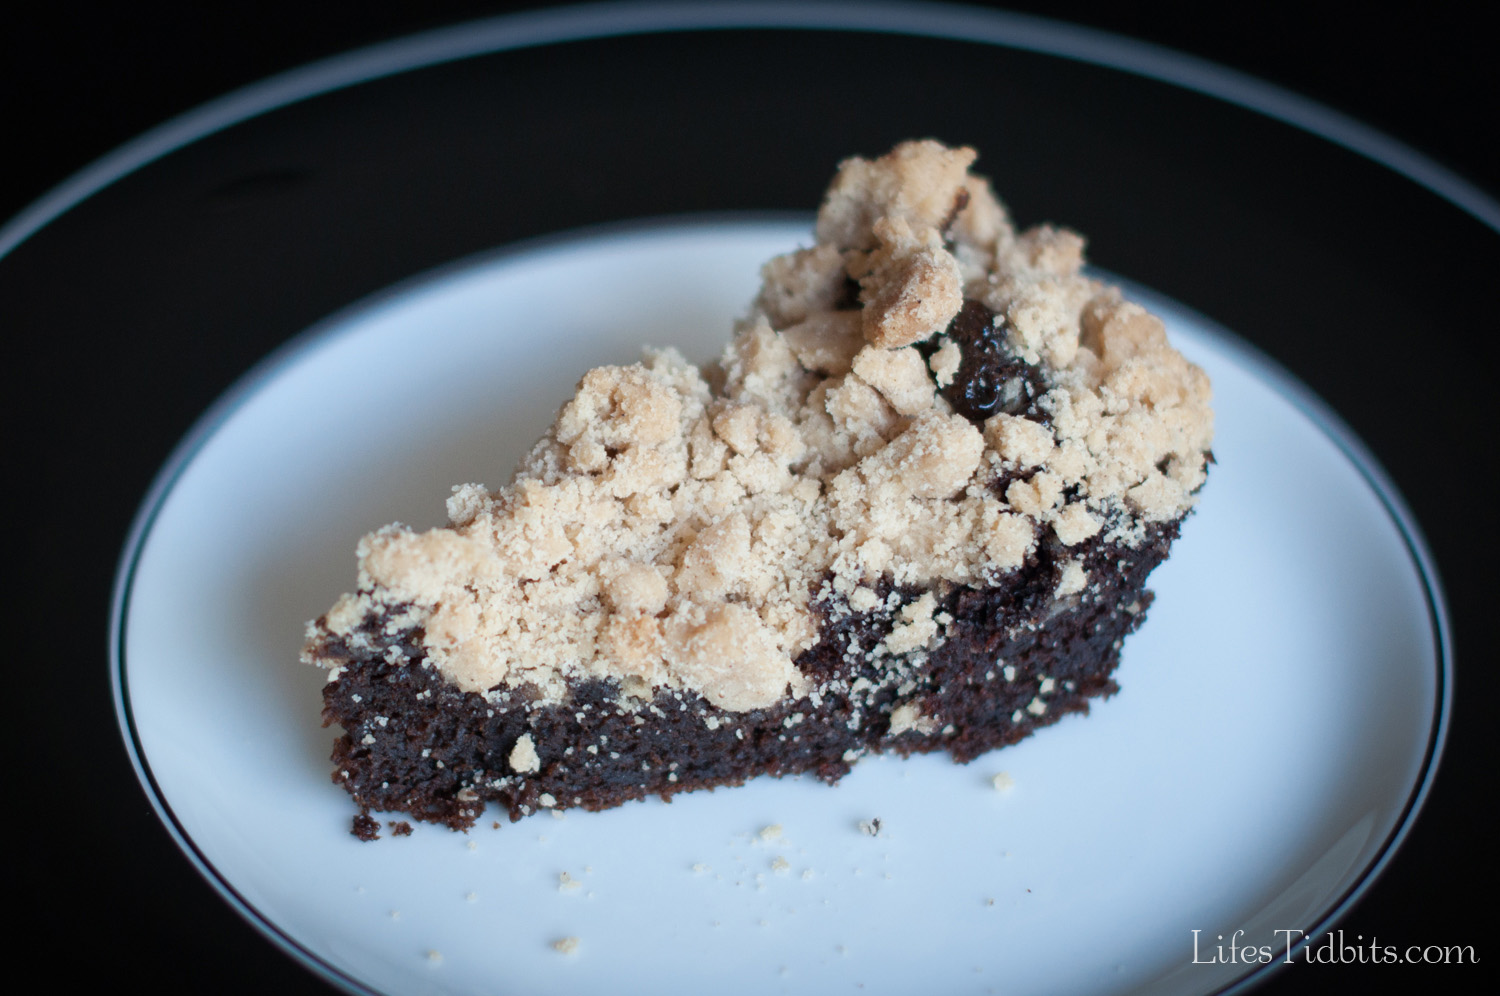
Although my crumb topping didn’t come our nearly as pretty as Tina’s the cake was absolutely DELISH!  The girls all loved it.  We even had seconds.  The husband, who isn’t a big chocolate fan (seriously, what’s wrong with him?!), really liked the piece he had when he returned from his trip.  I will definitely be making this chocolate crumb cake again … and soon!

Any recipes you’ve tried lately that you’d recommend?

If you enjoyed this post, please add your tidbit by commenting below.  Don’t forget you can follow us on PinterestInstagramFacebook and Twitter.

Share

I’ve recently become somewhat obsessed with making truffles. Right before Easter my friend came over to hang out and was interested in learning how to make truffles.  I had been dying to try out this new truffle recipe and decided it was the perfect time.  I told her we had to document the process as this was a recipe I had been planning to blog about.  So …. we collected all the ingredients, got the camera ready and the truffle making began!

Although I do really enjoy cooking by myself, having someone to chit chat with and lend that extra hand makes the process that much more fun!  I’ve been trying to think of a clever/fun name for these truffles, but haven’t come up with anything good yet.  I was considering PB&R, but that reminded me too much of the beer PBR … pout.  Any good name suggestions out there?

If you decide to go for the larger portion of peanut butter these truffles kind of become a fancier and more decedent version of Reese’s Peanut Butter cups with a hint of Raspberry.  Either way the feedback on this little dessert was very positive so it will definitely be staying in the make again (and again hahaha) pile of recipes.

Here we go … it’s truffle yummilious time!!

Raspberry Peanut Butter Truffles Recipe | Life's Tidbits

Ingredients
10 oz semisweet chocolate
1/2 cup heavy cream
2 tablespoon unsalted butter
1/2 teaspoon vanilla extract
1/2 teaspoon raspberry extract
1/4 cup peanut butter (if you are peanut butter LOVER do 1/2 a cup)
10 oz of chocolate for coating like melting chocolate

Raspberry Peanut Butter Truffles Recipe | Life's Tidbits

Directions
Chop the chocolate and put in a heatproof bowl.

Raspberry Peanut Butter Truffles Recipe | Life's Tidbits

Bring the heavy cream and butter to a simmer in a saucepan over medium heat.

Raspberry Peanut Butter Truffles Recipe | Life's Tidbits

Pour cream/butter mixture over the chocolate and let sit until melted, about 10 minutes. Stir with a rubber spatula or whisk until smooth. (If necessary, microwave in 20-second intervals until the chocolate melts.)

Raspberry Peanut Butter Truffles Recipe | Life's Tidbits

Stir in the vanilla and raspberry extracts.

Raspberry Peanut Butter Truffles Recipe | Life's Tidbits

Then stir in the peanut butter. Stir until the ganache is smooth and shiny.

Raspberry Peanut Butter Truffles Recipe | Life's Tidbits

Pour into a shallow baking dish (or leave in the glass bowl as I did) and refrigerate until firm, 1-2 hours or overnight.

Roll tablespoonfuls of the ganache into 24 balls, then return to the refrigerator for at least an hour.  Heat your melting chocolate in a double broiler or in a chocolate melting pot.  Drop each truffle into the melted chocolate and cover completely.  Transfer to a parchment-lined baking sheet.  Place in the refrigerate until firm.  Store is airtight container until ready to serve.  I like to let them sit at room temperature for 20 minutes before serving to ensure the center is nice and gooey!!

Raspberry Peanut Butter Truffles Recipe | Life's Tidbits

I hope you like this new tidbit!!! I’ve created an easy print recipe card for this recipe.

Raspberry Peanut Butter Truffles Recipe | Life's Tidbits

Click here for a 3×5 index card recipe card.

Recipe adapted from Food Network Magazine.

Happy Cooking!

If you enjoyed this post, please add your tidbit by commenting below.  Don’t forget you can follow us on PinterestInstagramFacebook and Twitter.

Share

With chocolate mustaches as the baby shower favor completed all I needed was to make the favor tags.  I ordered card stock to print the tags on and started designing them in PhotoShop.  I wanted the design of the tags to be similar to the custom invitations I made so the “paper products” would mesh.

Here’s the final product:

After cutting all the tags down to size using my favorite paper cutter I compiled everything I needed on the kitchen table.

With scissors I cut a small slit in the upper left corner of the tags and threaded the ribbon through.  The the husband got to play assistant and hold the favor bags as I tied the ribbon/tag on each mustache lollipop.

Here’s the final product!

The husband and I thought it would be fun to try out one of the extra mustaches on Sophi.  She was desperately trying to lick the chocolate while we photographed her.  Doesn’t she just look adorbs with her ‘stache?!?!

What do you think of the DIY party favor tags?  Stay tuned … more Little Man baby shower details coming up soon!

Happy Party Planning!!

If you enjoyed this post, please add your tidbit by commenting below.  Please follow Life’s Tidbits on Facebook and/or Twitter.

Share

A while back I found this blog post about chocolate mustaches.  I had been wanting to make them for a while.  After purchasing the chocolate molds on Amazon along with the lollipop sticks they sat in my cuboid waiting to be used.  I considered making some for a friend’s bachelorette weekend, but ending up making a cake instead.

Then one of my besties got pregnant AND she found out she was having a BOY!!! Finally, I offered to through her a baby shower and after a bit of research decided to do a “little man” themed shower.  Check out the DIY invitations for the baby shower.  FINALLY these mustache molds were going to come in handy!

I considered making the mustache chocolates as cupcake toppers, but decided they would be perfection as a thank you gift for the guests.  I bought the chocolate molds and lollipop sticks on Amazon.com, however I also found molds at Michael’s made by Wilton.

Here are the directions on how to create these adorable lollipops.

What you need:

Melt your chocolate as usual.  I melted the chocolate with my new Wilton Chocolate Pro that my parents-in-law got me this holiday season.  It works great and is a lot easier than trying to melt the chocolate in the microwave!  Anyways, about 1/4 LB of chocolate, makes 4 pops.

Fill the mold with chocolate using a teaspoon. Make sure it’s filed to the top, but don’t overfill the mold.  The chocolate should reach the outer corners. If you have any overflow or extra, wipe it clean.

Tap the mold gently on the counter to release air bubbles.  Push the sticks into the mold and carefully roll them until they are covered in chocolate.  Tap the mold gently on the counter again to smooth the surface.

Put mold in the freezer for about 10 minutes or until the chocolate releases from the mold when turned over.  If if the lollipops don’t come out easily put them back int he freezer for a few more minutes.

I ended up with 1/2 white chocolate and 1/2 milk chocolate.  I hope people like both types of chocolate or I am going to have A LOT of left over mustaches. :)  I’m pretty please with the final product!!

Happy Party Planning!

If you like this post, please add your tidbit below by commenting and/or add Life’s Tidbits to your RSS Reader :)

Share

I have become a big fan of citrus, specifically lemon, in my desserts as of late.  Maybe it started when we were on our honeymoon in Italy … the lemon gelto, limoncello and other lemon stuff was to die for.  Around the holiday season I found this recipe on How Sweet It Is and immediately put in on my must make list. White chocolate plus lemon = YUM!

Even the husband who isn’t a huge fan of chocolate in general, thought the lemon truffles came out great and is looking forward to me making them again.  Just a thought, but if you are making a fancy dinner for Valentine’s Day and looking for a special dessert, I do believe your search is over!!!

Ingredients:

10 ounces white chocolate, chopped
2 tablespoons unsalted butter
6 tablespoons heavy cream
1 teaspoon corn syrup
2 drops lemon extract
the zest of 1/2 a lemon
1 tsp fresh lemon juice
white sanding sugar for coating

Recipe slightly changed from How Sweet it Is to include more lemon!

Directions:

Place the white chocolate and butter to a bowl, then microwave on medium power for 30 seconds. Stir a few times, then microwave for 20 more seconds.

Add heavy cream and corn syrup to a small saucepan and heat over medium heat just until bubbles appear on the edges.  Immediately pour the cream over the melted chocolate and butter, stir for a few minutes until combined.  Add in the lemon extract and lemon zest, mixing to combine. Place in the fridge for 2 hours.

Remove from fridge and scoop out teaspoon-size balls of chocolate with a melon scoop or teaspoon and roll into balls.  You should have enough for about 30 truffles.

Then roll them in the sanding sugar and coat completely. Put them back in the refrigerator for about 30 minutes.  They will get a little bit soft when you create the balls so putting them back in the refrigerator helps.  Then serve and enjoy!

These little truffles are SUPER decedent and D-E-LISIOUS.

Happy Cooking!!

If you like this post, please add your tidbit by commenting below!  You can also follow Life’s Tidbits on Facebook and/or Twitter.

Related Posts Plugin for WordPress, Blogger...
Share