Happy Christmas to you and yours!!  This morning the husband and I hopped on a flight to the Midwest to spend Christmas with his family.  Since we were arriving Xmas day instead of Xmas Eve day this year I decided to make the Santa’s Whiskers cookies at home this year.  My cousin introduced me to this recipe and was kind enough to email me the recipe.  I searched the web for Santa’s Whiskers recipes and they are all pretty much the same.  I do follow the recipe my cousin provided as I know it is a keeper!  Although I am not a fan of candied cherries, I do really enjoy them in these cookies!  The cookies are super easy to make and I would think they are kid baking friendly as well.

Ingredients:

  • 1 Cup (2 sticks) Butter
  • 1 Cup Sugar
  • 1 tsp Vanilla Extract
  • 2 tbls Milk (or cream)
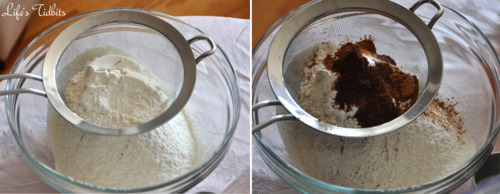
  • 2 ½ Cups of All Purpose Flour
  • ¾ Cup Red and Green Cherries
  • ½ Cup Chopped Pecans
  • ¾ Cup Coconut Flakes

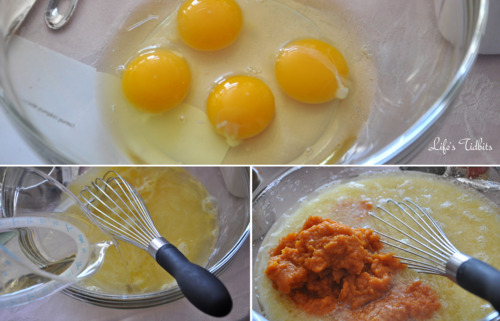
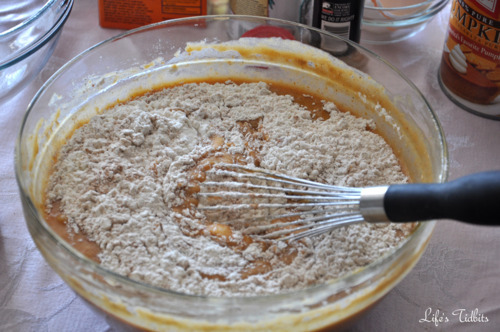
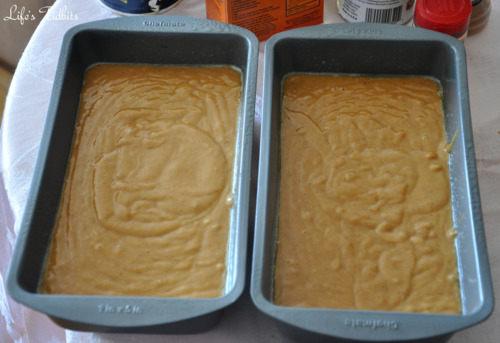
Blend together the butter and sugar until fluffy.  Mix in vanilla extract and milk.  Add the flour slowly into the mix until it is fully combined.  Add in the candied cherries as well as the pecans and mix well.  Split the batter in half and make about 10 inch logs.  Roll the logs in the coconut flakes and wrap in plastic.  Place in the refrigerator for 2-24 hours.

Preheat the oven to 375*.  Cut the cookies about ¼ an inch wide and place on a non-greased pan.  Cook for 12-15 minutes until the edges are a golden brown.  Allow the cookies to cool.  Serve and ENJOY!!

What is your favorite type of Christmas Cookie?

Happy Christmas!

Share

I’m not really sure how it’s already December.  It feels like it was just July, 90* outside and the holidays weren’t even on my radar.  But it is December, which means Hunukkah right around the corner … just two days to be exact.  It seemed like a good time to revisit the recipe below for the potato latkes.  What’s even crazier about this blog post is it was my very first real post!  So without further a-do here is the Potato Latke Recipe …

———————————————————————————————————————————————————————

Happy Hanukkah (or Chanukah depending on your spelling preference)!!!

This year my friend who usually hosts a Hanukkah party decided to go on a vacation with her sister and mom.  I mean really how dare she go away without providing me with potato latkes before she left. =)  So this meant I would have to make my own potato latkes for the first time ever.

This recipe is super easy and if you have a food processor / Cuisinart it is like a hop skip and a jump to the frying pan.

Ingredients:

2lbs (~3 large potatoes)
1 medium onion
2 eggs
1 tsp salt
2 tablespoons flour
vegetable oil

You will also need apple sauce and sour cream to serve with your potato latkes, and I guess if you are my husband then hot sauce should be on the table as well.  Hot sauce is new one for me and I would say skip it, but he insists it tastes good.

Using a food processor or a box grater shred the potatoes and onions. The food processor saved me a ton of time and makes it so easy!  I got to use one of the attachments for the first time, which is always exciting (it’s the small things, right?!).

Transfer them to a colander and squeeze dry. Mix the potatoes and onions with the eggs, flour and salt.

In a skillet, heat 1/4 inch of oil. Drop about four tablespoons for the mixture into the skillet and press lightly to flatten them. Cook over moderately high heat, turning once, until browned and a little crispy. It should be about 6 minutes.

I found that a fish spatula worked really well for flipping these babies and not messing them up.  Just randomly grabbed it, but thought I should pass along the tip nonetheless.  Remove from skillet and place the latkes on paper towels to drain the oil.  It makes about 12 latkes.  And take a look … Voila!

MAKE AHEAD: The potato latkes can be at room temperature for up to 3 hours. Reheat on a baking sheet in a 350° oven before serving. If you plan to reheat them remember that they cook a little extra in the oven so don’t over fry them.

Just writing this blog makes me want to go reheat the extra latkes and eat them!  Anyways put some sour cream (I prefer light as it is less fat but still tastes great) and apple sauce on the table and serve.

And seriously how cute is that double serving bowl?  Thank you wedding guest and Crate and Barrel’s Registry.

Happy cooking!

Don’t forget to leave your tidbit by commenting and/or add Life’s Tidbits to your RSS Reader :)

Share

With Thanksgiving right around the corner I thought this would be the perfect time to share one of my favorite recipes for the holiday.  This recipe was originally posted back in March, but I felt it was throwback worthy.  By the way I’ve never been a pumpkin pie, bread, etc lover, but this pumpkin bread recipe was a serious game changer!!!  Below is the original post for throwback Thursday.  Enjoy! 

———————————————————————————————————————————————————–

My sister and I found this recipe for pumpkin bread one fall afternoon when trying to decide what to make that wasn’t chocolate chip cookies. :) Cookies are our go to hang out and watch a movie snack.  We ate nearly a whole loaf in one sitting (or really standing in the kitchen over the loaf of bread) it was THAT good!  It’s now a must have item in our family for Thanksgiving dinner.

Besides the canned pumpkin most items are staples and you probably already have the ingredients in your kitchen.

Ingredients:
2 cups canned pumpkin (or homemade pumpkin puree)
3 cups sugar
1 cup water
1 cup vegetable oil
4 eggs
3 1/3 cups all purpose flour
2 teaspoons baking soda
2 teaspoons cinnamon
1 teaspoon salt
1 teaspoon baking powder
½ teaspoon nutmeg
¾ teaspoon ground cloves

Pre-heat the oven to 350 degrees.

In a separate bowl sift the flour into a bowl.  On your last cup of flour add the baking soda, baking powder, cinnamon, salt, nutmeg and cloves and sift together.

Combine pumpkin, sugar, water, oil and eggs in a bowl and beat together until mixed well.

Mix the dry ingredients with the wet ingredients slowly and beat until smooth.  Unlike chocolate chip batter this batter does NOT taste good. My sister and I made the mistake of trying the batter and thought the bread was going to be terrible.  But it’s is amazing once it is cooked, promise. So just hold off on any tasting. :)

Grease two 9 x 5 inch loaf pans with Pam or any nonstick spray. For easy clean up I recommend putting tin foil in the bottom of the pans first.  Pour the batter into the 2 loaf pans and try to evenly dividing the batter between the two.

Bake at 350 degrees for 60-70 minutes or until a toothpick comes out clean.  Get ready for your house/apartment to smells OH so YUMMY as the loafs cook! Remove from oven and allow loafs to cool before cutting.

Cut and server!  And watch out because you will without a doubt eat more than one slice. :)

Happy Cooking!!

Don’t forget to leave your tidbit by commenting and/or add Life’s Tidbits to your RSS Reader :)

Recipe from the Kitchen of: BlogChef.net

Share

PEOPLE  it is Tasty Tuesday!  What are you making for dinner tonight?  Last week I love made some spicy chicken curry for the hubby.  This take on chicken curry is definitely A LOT healthier than what you would get from a restaurant.  If you don’t like spicy stuff I suggest not using any (or as much) jalapeno and use all regular curry powder instead of the hot madras curry powder.  This recipe can totally be tweaked to fit your pallet and is pretty forgiving!

Ingredients
1 medium onion, chopped
3-4 cloves garlic, chopped
1/3 jalapeno, chopped
1 tablespoon garam masala
1/2 teaspoon ground cumin
1/4 teaspoon of ground cloves
2 tablespoons vegetable oil
1 tablespoons hot madras curry powder
1 tablespoon curry powder
3/4 cup water
1/2 cup condensed milk (Fat Free will taste just as good as full fat)
5 chicken breasts, cut into chunks
Kosher salt
Steamed broccoli
Steamed white rice, for serving

Chop the onion, garlic cloves and jalapeno.  Get out all your spices so you have them ready to use.

In a food processor combine the onion, garlic, jalapeno, garam masala, cumin, and cloves. Process to make a chunky paste.  Heat the oil in a large Dutch oven over medium heat. Add the onion mixture, curry powder, and 1/4 cup water. Let fry 4 to 5 minutes.

Add another 1/2 a cup of water as well as the 1/2 a cup of condensed milk.

I like to precook the chicken on my grill pan, however you don’t have to.  Precooking the chicken adds a pan to clean, but also speeds up the overall cooking time.

Add chicken pieces and salt to taste. Bring to a boil. Simmer until the chicken is cooked through, about 30 minutes.  If you precooked the chicken I would say about 10 minutes instead of thirty.  Add the steamed broccoli to the mixture.  Serve over rice – makes about 5 servings.

Bon Appetit!!

Don’t forget to leave your tidbit by commenting and/or add Life’s Tidbits to your RSS Reader :)

Share

I find it odd that I’m perfectly capable of caring for a dog, but give me a plant and the thing is dead in less than a week.  I mean it’s a serious black thumb problem I have.  We offered to water our neighbor’s plants while they were on vacation and I made the husband do it since I was afraid I would instantly kill them all.  Despite my inability to keep plants alive I’ve always wanted to have a little herb garden.  The thing is when I got into cooking recipes would call for fresh herbs.  So I would buy a package of mint, for example, and then only use two tablespoons.  The rest would sit in the refrigerator and go bad in no time.  Those little packages cost like $2 and you can buy a pre-planted herb for $2.99.  The way I see it is my black thumb is not only killing the plants, but my wallet too … hahahaha!

So this weekend the husband and I went herb shopping.  My big thing was I didn’t want to start from seedlings.  Apparently Home Depot doesn’t carry herb plants, only seeds.  I just assumed Home Depot would have them, so when they didn’t we had to go a different route.  We found basil at the grocery store and then chives, mint and parsley at a flower shop.  If I’m able to keep these four herbs alive I plan to add rosemary and thyme to my little “garden”.

We laid down some plastic so the potting soil didn’t get all over the hard woods and started planting the herbs.

When I was done planting the husband and I talked about where we should put our herb plants.  We have this little “balcony” off of our living room, which I’ve never really known what to do with.  A while back I stuck an odd chair out there.  I wouldn’t say it is an eye sour, but not exactly elegant either.  If I am able to keep these herbs alive I think it will be time to say goodbye to the old chair and hello to our herb garden.

But for now a little cohabitation will be going on. I don’t think the chair will mind sharing the space. :)

After only one night my basil is already wilting. I’m praying it perks back up.  This is not exactly the start I was hoping for.

People, please cross your fingers and channel some of your green thumb vibes my way!! I really hope these little guys make it.  Any tips for me on how to keep these little guys alive?

Don’t forget to leave your tidbit by commenting and/or add Life’s Tidbits to your RSS Reader :)

Related Posts Plugin for WordPress, Blogger...
Share