I was on the search for taco seasoning from scratch when I found the recipe below.  I like the seasoning you can buy at the grocery store in the package, but I felt it had to be easy enough to make from spices we already had in the house.  This recipe is SUPER easy to make and is perfect for dinner as well as lunches!  All in all the recipe is very healthy.  I ate A LOT of taco salads when I was doing the whole wedding / weight watches diet a couple years ago.  Although I got a little taco salad’ed out in 2011 it is still a go to dinner in our house every couple of weeks.

TacoSalad

Ingredients:
Salad
1 can Black Beans
1 pkg Ground Turkey

Taco Seasoning –
2 tablespoons chili powder
1 tablespoon ground cumin
2 teaspoons cornstarch
2 teaspoons kosher salt
2 teaspoons paprika
1 teaspoon ground coriander
1/8 to 1/4 teaspoon cayenne pepper (depending on how spicy you want it)

Directions:

This recipe makes about 5 servings.  Here’s all you’ve got to do …

Make your salad.  I use romaine lettuce, red pepper, yellow pepper, red onion and cucumber.

tacosalad_salad

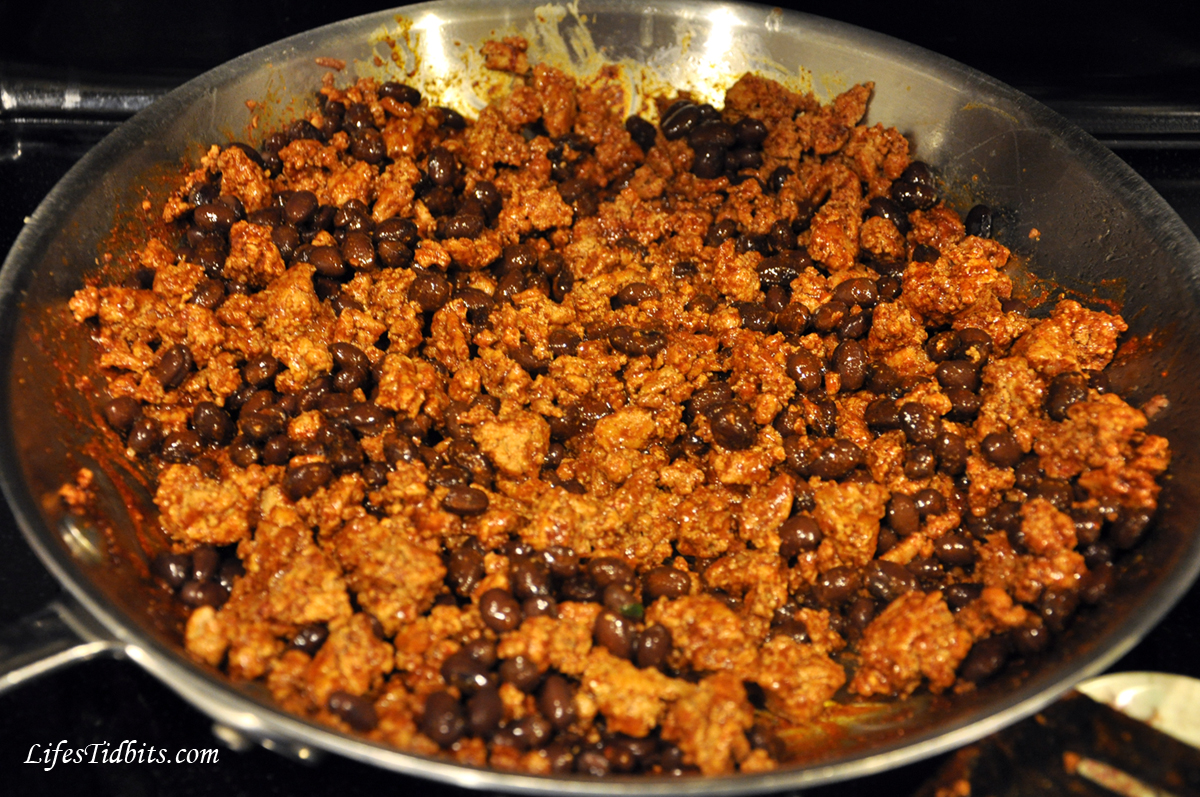
Brown your ground turkey (you can also use ground beef if you want).  Meanwhile combine your spices in a small bowl and put the black beans in a pan to cook/warm on the stove top.  Once the meat is browned add the taco seasoning and about 1/4-1/2 cup of water.  Mix the spices, water and turkey well.  Allow it to simmer until most of the water has evaporated or been absorbed by the meat.  Drain the beans once heated through and add them to the turkey.

tacosalad_meatbeans

I like to portion out the salad first and then scoop the turkey/bean mixer on top.  Serve and enjoy!  I always serve the salad with corn chips.  The husband and I both like to crumble a few of the chips over the salad for a little extra crunch/salt/yumminess.

What are you having for dinner tonight??

Happy Cooking!

If you enjoyed this post, please add your tidbit by commenting below.  Don’t forget you can follow us on PinterestInstagramFacebook and Twitter.

Share

Last week I was totally craving homemade mac & cheese.  I am not really sure what triggered the need for this dish given I haven’t had it in ages.  In any event mac & cheese was going to happen in my belly!  This super cheese homemade mac & cheese is a serious comfort food dish.  According to the husband and a friend who joined us for dinner they said this mac & cheese recipe is a winner!  Just looking at the picture makes me want to eat some.  YUMMY!!

Recipe inspired from A Cup of Jo and The Pioneer Woman.

Ingredients:

1 box pasta
2 cups milk
3 tablespoons unsalted butter
3 tablespoons all-purpose flour
1/2 teaspoon salt
1/2 teaspoon ground/dry mustard
12 oz Sharp Cheddar Cheese
1/4 cup plus 2 tablespoons grated parmesan
1/4 cup bread crumbs

Directions:

Preheat the oven to 350*

Cook pasta until al dente and drain.  Remember to salt the water before adding the pasta!

In a sauce pan, melt butter and add in the flour. Whisk together over medium-low heat. Cook mixture for five minutes, whisking constantly.

Slowly add the milk and continuing whisking.   Add mustard and reduce the heat to low.  Add in cheddar cheese a handful at a time and only add more once the cheese is completely melted.  Add the grated parmesan last.   Pour cheese/milk mixture over the pasta and stir to combine.  Pour pasta into a baking pan.

In a separate bowl combine the bread crumbs and 2 tablespoons of parmesan and then  pour over the pasta as evenly as possible.  Bake for 20 to 25 minutes or until bubbly and the top is golden.

Serve and most important enjoy!  This dish is a great main meal, side dish and makes wonderful lunches.

Happy Cooking!

If you enjoyed this post, please add your tidbit by commenting below.  Don’t forget you can follow us on PinterestInstagramFacebook and Twitter.

Share

I’ve recently become somewhat obsessed with making truffles. Right before Easter my friend came over to hang out and was interested in learning how to make truffles.  I had been dying to try out this new truffle recipe and decided it was the perfect time.  I told her we had to document the process as this was a recipe I had been planning to blog about.  So …. we collected all the ingredients, got the camera ready and the truffle making began!

Although I do really enjoy cooking by myself, having someone to chit chat with and lend that extra hand makes the process that much more fun!  I’ve been trying to think of a clever/fun name for these truffles, but haven’t come up with anything good yet.  I was considering PB&R, but that reminded me too much of the beer PBR … pout.  Any good name suggestions out there?

If you decide to go for the larger portion of peanut butter these truffles kind of become a fancier and more decedent version of Reese’s Peanut Butter cups with a hint of Raspberry.  Either way the feedback on this little dessert was very positive so it will definitely be staying in the make again (and again hahaha) pile of recipes.

Here we go … it’s truffle yummilious time!!

Raspberry Peanut Butter Truffles Recipe | Life's Tidbits

Ingredients
10 oz semisweet chocolate
1/2 cup heavy cream
2 tablespoon unsalted butter
1/2 teaspoon vanilla extract
1/2 teaspoon raspberry extract
1/4 cup peanut butter (if you are peanut butter LOVER do 1/2 a cup)
10 oz of chocolate for coating like melting chocolate

Raspberry Peanut Butter Truffles Recipe | Life's Tidbits

Directions
Chop the chocolate and put in a heatproof bowl.

Raspberry Peanut Butter Truffles Recipe | Life's Tidbits

Bring the heavy cream and butter to a simmer in a saucepan over medium heat.

Raspberry Peanut Butter Truffles Recipe | Life's Tidbits

Pour cream/butter mixture over the chocolate and let sit until melted, about 10 minutes. Stir with a rubber spatula or whisk until smooth. (If necessary, microwave in 20-second intervals until the chocolate melts.)

Raspberry Peanut Butter Truffles Recipe | Life's Tidbits

Stir in the vanilla and raspberry extracts.

Raspberry Peanut Butter Truffles Recipe | Life's Tidbits

Then stir in the peanut butter. Stir until the ganache is smooth and shiny.

Raspberry Peanut Butter Truffles Recipe | Life's Tidbits

Pour into a shallow baking dish (or leave in the glass bowl as I did) and refrigerate until firm, 1-2 hours or overnight.

Roll tablespoonfuls of the ganache into 24 balls, then return to the refrigerator for at least an hour.  Heat your melting chocolate in a double broiler or in a chocolate melting pot.  Drop each truffle into the melted chocolate and cover completely.  Transfer to a parchment-lined baking sheet.  Place in the refrigerate until firm.  Store is airtight container until ready to serve.  I like to let them sit at room temperature for 20 minutes before serving to ensure the center is nice and gooey!!

Raspberry Peanut Butter Truffles Recipe | Life's Tidbits

I hope you like this new tidbit!!! I’ve created an easy print recipe card for this recipe.

Raspberry Peanut Butter Truffles Recipe | Life's Tidbits

Click here for a 3×5 index card recipe card.

Recipe adapted from Food Network Magazine.

Happy Cooking!

If you enjoyed this post, please add your tidbit by commenting below.  Don’t forget you can follow us on PinterestInstagramFacebook and Twitter.

Share

More often than not I am rushing around the house in the morning getting ready for work.  The morning routine includes all the normal things one normally does plus walking the dog and making lunches for me and the hubby.  Despite being in the kitchen doing the lunches I often forget to take meat out of the freezer and put it in the refrigerator.  Does that ever happen to you?  Forget to take the chicken, beef, pork or fish out of the freezer to properly prepare for dinner that evening?  Since I make this mistake often I will sometimes go to the store on the way home from work and purchase what I need.  Other times I get home and slap the meat on the counter and pray it defrosts quickly so I won’t have to nuke it.  For some reason defrosting in the microwave seems to always “pre”cook the meat, which I don’t find appealing.

Recently my mother-in-law taught me a great tip for defrosting meat quickly …. place the meat on a metal cookie sheet.

Source

I’m not really sure why this works, but it does so I’m not going to fight it!  Next time you forget to take dinner out of the freezer in the morning to thaw go ahead and slap it on a metal sheet pan.  Wait a little while and flip the meat.  The quick defrosting time will definitely not disappoint.  What’s your tip for defrosting meat quickly?

Happy Cooking!

If you enjoyed this post, please add your tidbit by commenting below.  Don’t forget you can follow us on Pinterest, Instagram, Facebook and Twitter.

Share

It’s Tuesday, which means it’s time to share another Tasty Tuesday recipe!  Ever since I ate a sugar cookie at Potbelly’s I’ve been on the look out for a killer homemade sugar cookie recipe.  Have you ever had a Potbelly sugar cookie?  They are A-MAZING! You should seriously try one.  It is a little crunchy on the outside and complete heaven in the middle.  Yes, I know, I am completely obsessed.

During my quest to replicate this recipe I found a post on HWTM blog that resulted in a pretty good cookie.  In all honesty though it didn’t rival the Potbelly cookie, so the search continued.  Last week a friend shared a recipe from Savory Sweet Life with me.  With rave reviews I hoped these sugar cookies would meet my expectations … and boy did they ever!  Yummolious!

Not only is my quest for an amazing homemade sugar cookie over, but I can also check off cooking one new recipe each month from my new years resolution list, for the month of January!

One thing to note about this recipe is finding the sugar crystals in the grocery store is tough. Neither Safeway nor Harris Teeter carry the sugar crystals, so planning ahead is important.  I was able to locate sugar crystals at Michael’s and Amazon.com.  Since the sugar crystals wouldn’t be delivered until Friday and I needed the cookies for girls night on Thursday I went ahead used left over blue sugar sprinkles.

Ingredients

  • white sugar
  • salted butter
  • egg yolks
  • vanilla extract
  • all-purpose flour
  • baking soda
  • cream of tartar
  • salt
  • coarse sugar crystals  {can substitute regular granulated sugar}

Get full recipe here

Directions:

Preheat oven to 350 degrees F.

Cream the butter and sugar together until it is nice and creamy.  Mix in 1 egg yolk at a time and then the vanilla extract.

In a bowl mix together the flour, baking soda, cream of tarter, and salt.  Slowly add to the mixer until the cookie dough is completely mixed.  Scrape down the bowl to be sure everything is mixed.  Using a medium scoop, form dough balls.

Roll the cookie ball in sugar crystals and place on a cookie sheet lined with parchment paper about 2 inches apart from one another.  Or you can use a baking mat if you don’t have parchment paper.  I suggest flattening them out just a little so the center doesn’t get too puffy (the original recipe said not to flatten them).

This recipe makes about 30 medium sized cookies.  Bake for 12-14 minutes.  Make sure not to over cook them.  They will harden as the cool.  I made the mistake with one batch of leaving them in too long cause they didn’t look golden brown to me.  Remove from oven and allow cookies to remain on the cookie sheet for 5 minutes before transferring to a cooling rack.

Enjoy and Happy Cooking!

If you enjoyed this post, please leave your tidbit by commenting below!  You can also follow Life’s Tidbits on Twitter.

Related Posts Plugin for WordPress, Blogger...
Share