
After making our wedding invitations, calligraphy envelopes and then rehearsal dinner invitations oh and the escort cards I figured why not make the menu cards as well?!?!
We went back and forth about having 2 menu cards per table or a a menu card for each guest. In the end since the cost difference was minimal we decided to go for a menu card for each guest.
What you need:
Paper cutter, Printer/Ink, Card Stock and Photoshop or MS Word
Menu cards are one of those things you can do ahead of time, but no too far ahead. It’s important to have had the tasting and finalized the WHOLE menu. If the menu isn’t finalized then some reprinting might be in your future. When using PhotoShop my suggestion is to paste the menu text into MS Word first so everything is spelled correctly. Even with my husband and I both double checking the menu card we missed a spelling mistake and had to reprint a number of menus. :( Thank goodness one of the bridesmaids caught the mistake! Oh and don’t forget to figure out approximately how many menu cards are needed. I made a few extras just incase. The extra menus weren’t used, but it was nice to have a “clean” one for the wedding scap book!
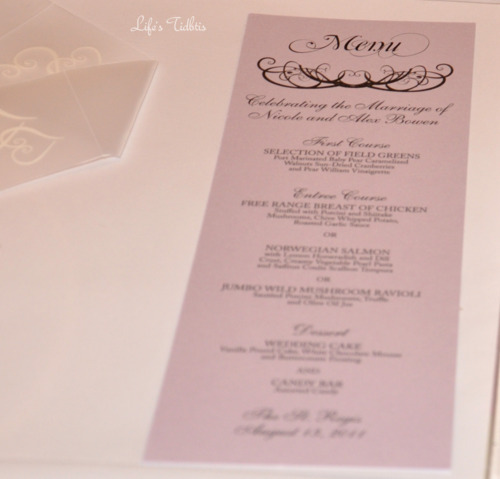
Menus come in all shapes and sizes. An important thing to consider when deciding on a size is will it be big enough to fit all the text. We had three entree choices (fish, chicken and vege), which took up a lot of room on the card. I went with long thin menu cards – 3.5 by 11. Partly this was because of the text length, but honestly it made for easy paper cutting as well … one cut and done.
For the wedding and rehearsal dinner invitations I did the paper cutting after the printing. For the menus I cut the paper first and then did the printing.
I didn’t really have a menu “inspiration” card, however I did reference the menu cards of weddings I had previously been to. I decided I wanted a small image/graphic at the top and then the rest of the card to have a clean look. To tie the menu card in with the rest of the wedding paper items I re-used (FREE!) fonts: Mutlu Ornamental and Adobe Pro – from the Wedding Invitations and Allegro – from the DIY Calligraphy Envelopes.
We also used the same type of paper from the wedding/rehearsal dinner invitations, but in a different color – light purple! The light purple looked great with the gold table clothes and sterling silver roses on each of the tables. Here’s how they looked:

Photo credit: Korie Lynn Photography
I went back and forth on rounding the edges of the menu, but in the end my mother and husband liked the non-rounded look better.
My tips are pretty much consistent with other printing related projects I’ve blogged about:
- Print on High Resolution
- Spell check!
- Print tests on white paper before doing a test on your nice card stock. White paper is far less expensive!
- Don’t wait to the last minute.
Happy DIY and Wedding Planning!!
Did you make your own menus? Any tidbits for other brides you can share?

Don’t forget to leave your tidbit by commenting below! :)
