I planned a small/intimate surprise birthday party for my husband turning 30. And let me tell you he was SHOCKED when he walked in the front door. I decided early on that I wanted the party to be beer themed, which clearly meant the cake needed to go with the theme. I was very inspired by a bottle cap cake I found on a blog.
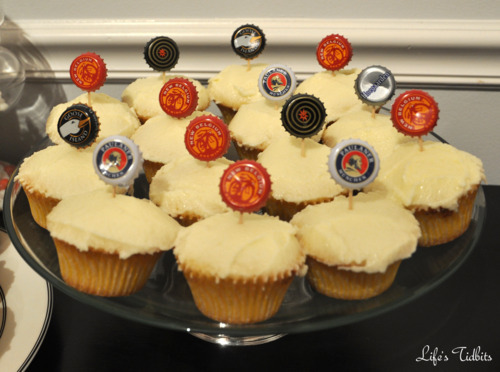
Unfortunately when it came time to making the cake I didn’t have enough time to make fondant. So I went with option B. Swiching from a cake to cupcakes. I mean cupcakes are in anyways so win! Then I made made little bottle cap decorations for each of the cupcakes. They are super easy to make. AND how cute are these???

What you need:
Toothpicks
Glue
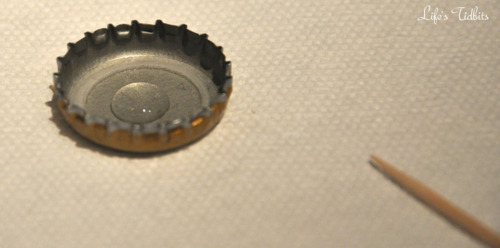
Beer Bottle Caps

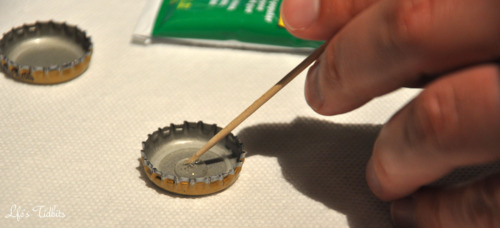
Place a small dot of your duco cement in the center of the bottle cap. Let it dry for 30 seconds or so.
Place the toothpick at an angle into the glue dot. Roll the toothpicks in the glue a little. Then hold it in place. Unlike my husband try to put the toothpick at an angle and against the bottle cap edge.
Instead of holding the toothpick while it drys, which takes FOREVER there’s a better option! This took me a while to figure out, but in the end it was a life saver. Put a second bottle cap on top of the bottle cap/toothpick like so …
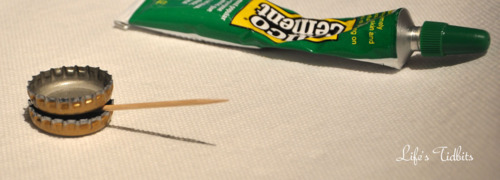
Let dry for at least 15 minutes. The longer the better and depending on the glue you use they will dry at slower or faster rate than mine did. Then stick it into the cupcake and away you go. I think it would have been nice to have a few more different types of beer bottle caps, but over all I am very pleased with how they turned out! Check out the little display:
The color theme of the surprise party was yellow and chocolate brown. The cupcake liners had yellow stripes on them. You can find them here and they are pretty cheap and come in a lot of different colors.
Remember how much I wanted to use barbershop straws again? I got them for the surprise party!! The other small decoration included brown and yellow balloons.

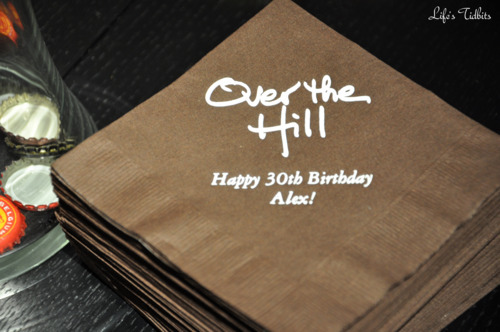
Oh and one more fun little detail for the party … custom napkins! I had wanted to do custom napkins for our wedding, but it didn’t work out. I would never plan another party without custom napkins. I love how they turned out!!
Surprise parties are so much fun and all the little tidbits and extra details all the difference in making the party look so cute. :)
Happy DIY and party planning!
Don’t forget to leave your tidbit by commenting below :)