When I decided to throw my friend’s baby shower I immediately started searching Pinterest and Google for inspiration.  I quickly fell in love with all the details of “Little Man” aka “Mustache” baby shower / birthday parties I found.

With the theme chosen the search for an invitation began.  Although initially the plan was to purchase pre-made invitations, I soon decided to try my hand at designing my own invitation.  I figured if the design wasn’t nailed down in time I could always order one of the many available options.

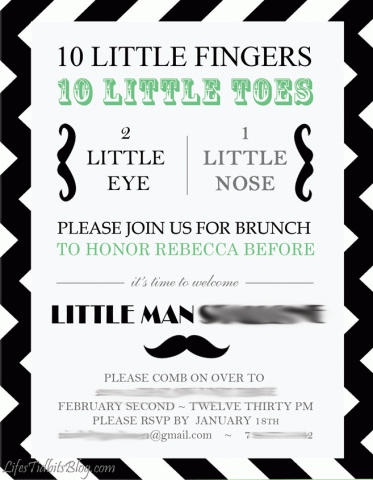
The invite was created PhotoShop and the mustache graphics purchased from ShutterStock.  It took a number of iterations, but the end result was exactly what I had envisioned!  Although I had successfully DIY’ed our wedding invitations, I wasn’t sure I would have success with baby shower invites.  Before revealing the final product to my husband, parents and sister I made them promise to give me their brutally honest opinions.  With their stamp of approval I moved forward with ordering the baby shower invites from Overnight Prints.

Font of the Invitation (JPEG Version):

DIY Little Man / Mustache Baby Shower Invitation |  Life's Tidbits

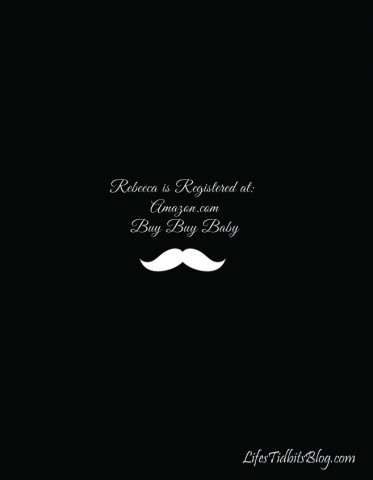
Back of the Invitation (JPEG Version):

DIY Little Man / Mustache Baby Shower Invitation |  Life's Tidbits

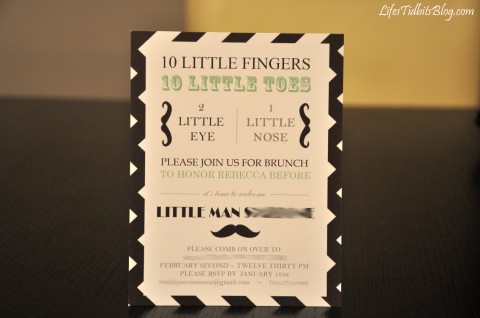
When they arrived in the mail I was ecstatic and hopeful the printed version would meet my expectations.  I was very pleased with the quality of the paper, printing and turnaround time of my order!  I kind of wish they looked a little shiny and/or glossy, but the matted is probably for the best.

DIY Little Man / Mustache Baby Shower Invitation |  Life's Tidbits

In an effort to save myself time, as well as spare everyone my horrible handwriting, I reused my DIY wedding calligraphy directions to print the address and return address on all the envelopes.  The font for the addresses is Lucida Calligraphy, which is a free font.

The invitations/envelopes are completed and in the mail.  Now it’s time to focus on finalizing the decorations, menu and shower games for the shower!!

So I mustache you … what do you think of the DIY baby shower invitations?

Happy DIY!

If you liked this post, please add your tidbit by commenting below!

Share

My friend Kia threw her son a first birthday party a few weeks back.  The party was decked out with all sorts of details and DIY projects.  As co-owner of Baker’s Bliss she also made all her own cupcakes for the party!  Party details as told by Kia…

For my son’s 1st Birthday I wanted to do something different and something fun.  Hopefully, along the lines of cost effective as well.  I looked through a variety of themes of things to do and most of them felt too kiddy.  As every parent knows the first birthday party is more for the adults than the kids and so I wanted a fun theme that all ages could enjoy.   I searched the internet high and low and ultimately fell in love with the posts I had seen from different moms who had decided on the “one year in a flash” theme.

I didn’t have a lot of time to put the party together being a full time mom of 2 plus my full time job left me with not that much time to put the grandiose party on that I wanted too.  However, my bestie and business partner Rebecca was in town to save the day.   And so began the party planning….

First, I made a list of what I wanted to do.  It was hard to come up with this list because I really wanted to do all the ideas I had seen on the internet.  They ranged from photo booths and custom chalkboards to custom banners and cupcake stands.  All of which I thought was ridiculously creative and cute, but I had to be realistic.  I really had about 3 days and unlike most of the other party planners I had intended on making my own cupcakes because that’s just what I do!  So these are the things I decided I was going to do for the party.

Decorations:

  • Custom Banner (What better way to say you are 1 then a year of pictures to remind you)
  • Custom Cupcake Toppers
  • High Chair Banner
  • Balloon Display
  • Photo Booth
  • Custom Thank you Cards
  • Custom Water Bottles

Food:

  • Dessert Table complete with custom chocolate covered Oreos in the theme colors and “camera” sugar cookies.
  • Chocolate Cupcakes with Vanilla Bean Buttercream
  • Vanilla Bean cupcakes with Vanilla Bean Buttercream
  • Pigs in a blanket for the kids
  • Veggie Tray
  • Fried Chicken
  • Queso Dip
  • Chips

This all seemed pretty overwhelming so I ended up ditching the Photo Booth.  I simply just didn’t have the time or the energy given the list of other things that had to get accomplished.

For the Banner, Thank You Cards and Cake Toppers I needed photos!  It was already Wednesday and the party was Saturday so I had to come up with the photo digging through all my digital memorabilia over the last year and get them printed and ready really by Thursday.  CVS photo online to the rescue!  I uploaded the pictures and picked them up at the CVS down the street from me the next morning and it was only .19 cents a picture!   This really came out very cost effective since in addition to the 12 pictures I needed 24 cupcake toppers and 20 thank you cards.

Here’s how the banner came out:


Here are the Thank You Cards:

And the Cupcake Toppers:

Here’s how the dessert table turned out:

You can see my nice balloon display courtesy of Party City.

Admittedly, most of the food items I purchased them from the local super market.  The Fried Chicken was purchased the hubby and then he made the veggie tray and queso dip.  I made the pigs in a blanket and here is what the food table looked like.  The table display was done by my friend Monique!

The chocolate covered Oreos were a big hit and proudly displayed on the right and the custom water bottles on the left.  After all the work it all turned out great.  We all had an amazing time.  I hope you enjoy the pictures and the ideas.  It was a great party!

Check out the Baker’s Bliss website or like them on Facebook.  Thank you Kia for stopping by and sharing your party tidbits with us!!

Happy Party Planning!

Share

It seems we have come to the end of the wedding related posts.  I’ve shared my bridal shower and the bachelorette party as well as my wedding dress purchasing experience.  And let’s not forget about it pouring down rain only a few hours before what was suppose to be an outdoor ceremony.  Below I’ve listed all of the DIY projects we tackled along the way as well as the vendors we used.

But before we get to that here are just a few of my favorite pictures from the big day!  All of the photos below were taken by Korie Lynn Photography.

How cool is that detail shot?!?!  The pearl bracelet was HANDMADE by my Aunt!  I couldn’t find what I wanted so she made me the most perfect bracelet I could have ever imagined.

I had always dreamed of getting a picture in front of the white house and this was the perfect shot.  Luckily the rain held off until after this picture was snapped :)

This was taken in the lobby of the St. Regis a little while before the ceremony.  We had time to squeeze in a couple more photos so I suggested the purple couch since it matched our wedding colors.  I love that we are all smiles!

And last but certainly not least the picture above!  There I am between the two most important men in my whole life!  My husband to the left and my Dad to the right.  Not to mention all the special faces I can pick out in the crowd behind us.

Okay so there are some of the top pictures of the evening now for the roundup …

DIY Projects:

  1. Invitations
  2. Envelope Calligraphy
  3. Rehearsal Dinner Invites
  4. Escort Cards
  5. Table #s, Stamps and Thank You Cards
  6. Candy Buffet/Bar
  7. Menu Cards

Vendors:

Ceremony/Reception Venue: St. Regis Hotel
Photographer: Korie Lynn Photography
Floral Designer: MultiFlor
Band: ‘Round Midnight
Videographer: Suburban Video
Hair: George Salon
Makeup: Go Go Gorgeous
Wedding Dress: Stephen Yerick
Bridesmaids Dresses: Lazzaro
Groomsmen: Joseph A Bank

Oh and just in case you missed it we spent our honeymoon in Italy – Positano, Sorrento, Cinque Terre and Rome.

Happy Wedding Planning!!

Don’t forget to leave your tidbit by commenting and/or add Life’s Tidbits to your RSS Reader :)

Share

Centerpieces and/or flower arrangements can be quite costly this time of year.  With Thanksgiving over and Christmas right around the corner it seemed like the perfect time to share the DIY rose and cranberry center pieces we make every Thanksgiving.  My mom got the idea when walking through the flower section in Whole Foods a few years ago.  My mother use to be in charge of making the arrangements, but then my sister took over.  Check out our pretty Thanksgiving table will all the yummy food!!

My sister was kind enough to let me document the process of the center piece creation this year.  So here we go!

What you need:

  • ~27 Yellow Roses
  • 6 bags of whole cranberries
  • 3 square vases
  • water

Place the cranberries in the square vases and add water (but not all the way to the top).

Remove the leaves from the rose stems and hold it up to the vase to determine how much stem to cut off.  Cut off the stem.

Push the rose into the vase between the cranberries.  Then rinse and repeat!!  Each vase will hold about 9 roses depending on the size of the vase.

After you’ve put in all the roses add additional cranberries and water as needed so they are almost to the very top of the vase.  In this end this is what you get.

As you can see we miss counted the yellow roses this year and had to through in a few red ones. I think it still looks pretty cute!

Happy Holidays and DIY!

Don’t forget to leave your tidbit by commenting and/or add Life’s Tidbits to your RSS Reader :)

Share

It’s almost time to call our wedding stuff a wrap, but before I do I MUST, must, must share with you my DC bridal shower.  My girls planned a lingerie bridal shower for me which was fabulous and the details were perfection.  The Newlywed Game was was pretty hilarious.   Before the bridal shower they asked my husband questions about the me and our relationship.  Then I was asked the same questions.  For each question I got wrong I had to chew a piece of bubble gum.

In the picture on the left we are all laughing and my sister is passing me some gum since I got a question wrong.  In the picture on the right I am clearly hesitant about the next question that will be asked.

Although I did pretty well I was definitely drooling because I was chewing so much bubble gum by the end of the game.  Do you see the tissue/napkin in my hand … yes I was starting to drool LOL.  That bubble gum is JUICY I tell you!  To go with the lingerie theme my cousin (who is insanely talented in the cake baking/designing department) made this beautiful cake:

I believe it is two sheet pan cakes – one for the base and one for the body – and the boobs were cupcakes.  I’ve been dying for a friend to have a lingerie themed bridal shower or bachelorette.  I would love to attempt to make this cake.  I found one blog that gave step by step instructions on how to make the cake, but it has recently been removed … POUT!  I should have copied the direction as soon as I found the blog – lesson learned.

And because one DIY baked good just wouldn’t do my sister and my mom’s friend made a second.  They made butt/lingerie cookies for all bridal shower guests.  Not only were the cookies yummy, they were so cute!  But these cookies are hard to transport.  The cookies pictured below were among the survivors from the 1.5 hour flight to DC from Boston.  Luckily they planned ahead and made extra in the event that some of the cookies broke during their travel time.  It’s strongly recommended you don’t travel too much with these little guys or they might get ruined.

So what did they need to make these cookies you might ask …

  1. Sugar Cookie Recipe
  2. Heart shaped cookie cutter
  3. White Frosting mixed with different food coloring
  4. Frosting bags and tips

I Facebooked my mom’s friend and she was kind enough to give me some tips on how to make these cookies come out right.   “I used a rolled sugar cookie dough.  Rolled it out and cut them into heart shapes. as soon as they came out of the oven, I cut off the tip end of the cookie, forming the butt part.  It was a lot of trial and error.  I tried doing that before I cooked them, but it didn’t work. they would swell and spread and not even look like a ‘fat butt’. ”  Thanks for the tips Kathy!!  Then the frosting bags were filled with tips and frosting.  From there you just decorate each individual cookie.

The husband showed up at the end of the shower to have dessert with me and all my lovely ladies.  My dad was there as well … don’t worry we wouldn’t leave him out.  :)  As folks were picking out their cookies and saying goodbye I snapped this fun picture of my little sister and husband.  I LOVE the picture and THEM!!!

The shower was SO much fun!  Do you like the cake and butt cookies?  I know I do!!!

Don’t forget to leave your tidbit by commenting and/or add Life’s Tidbits to your RSS Reader :)

Related Posts Plugin for WordPress, Blogger...
Share