When I decided to throw my friend’s baby shower I immediately started searching Pinterest and Google for inspiration.  I quickly fell in love with all the details of “Little Man” aka “Mustache” baby shower / birthday parties I found.

With the theme chosen the search for an invitation began.  Although initially the plan was to purchase pre-made invitations, I soon decided to try my hand at designing my own invitation.  I figured if the design wasn’t nailed down in time I could always order one of the many available options.

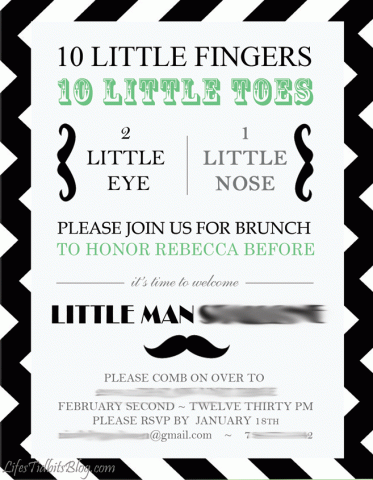
The invite was created PhotoShop and the mustache graphics purchased from ShutterStock.  It took a number of iterations, but the end result was exactly what I had envisioned!  Although I had successfully DIY’ed our wedding invitations, I wasn’t sure I would have success with baby shower invites.  Before revealing the final product to my husband, parents and sister I made them promise to give me their brutally honest opinions.  With their stamp of approval I moved forward with ordering the baby shower invites from Overnight Prints.

Font of the Invitation (JPEG Version):

DIY Little Man / Mustache Baby Shower Invitation |  Life's Tidbits

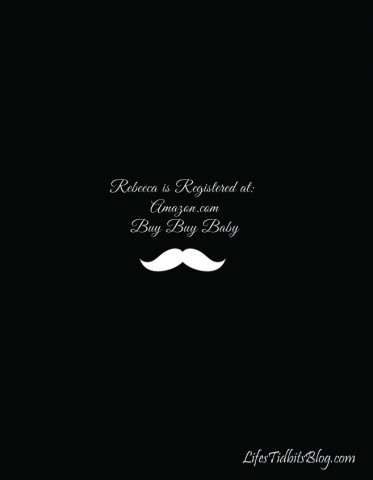
Back of the Invitation (JPEG Version):

DIY Little Man / Mustache Baby Shower Invitation |  Life's Tidbits

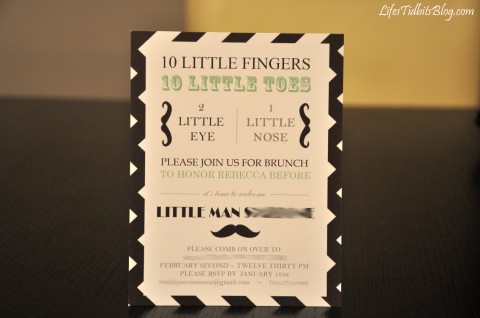
When they arrived in the mail I was ecstatic and hopeful the printed version would meet my expectations.  I was very pleased with the quality of the paper, printing and turnaround time of my order!  I kind of wish they looked a little shiny and/or glossy, but the matted is probably for the best.

DIY Little Man / Mustache Baby Shower Invitation |  Life's Tidbits

In an effort to save myself time, as well as spare everyone my horrible handwriting, I reused my DIY wedding calligraphy directions to print the address and return address on all the envelopes.  The font for the addresses is Lucida Calligraphy, which is a free font.

The invitations/envelopes are completed and in the mail.  Now it’s time to focus on finalizing the decorations, menu and shower games for the shower!!

So I mustache you … what do you think of the DIY baby shower invitations?

Happy DIY!

If you liked this post, please add your tidbit by commenting below!

Share

My friend Kia threw her son a first birthday party a few weeks back.  The party was decked out with all sorts of details and DIY projects.  As co-owner of Baker’s Bliss she also made all her own cupcakes for the party!  Party details as told by Kia…

For my son’s 1st Birthday I wanted to do something different and something fun.  Hopefully, along the lines of cost effective as well.  I looked through a variety of themes of things to do and most of them felt too kiddy.  As every parent knows the first birthday party is more for the adults than the kids and so I wanted a fun theme that all ages could enjoy.   I searched the internet high and low and ultimately fell in love with the posts I had seen from different moms who had decided on the “one year in a flash” theme.

I didn’t have a lot of time to put the party together being a full time mom of 2 plus my full time job left me with not that much time to put the grandiose party on that I wanted too.  However, my bestie and business partner Rebecca was in town to save the day.   And so began the party planning….

First, I made a list of what I wanted to do.  It was hard to come up with this list because I really wanted to do all the ideas I had seen on the internet.  They ranged from photo booths and custom chalkboards to custom banners and cupcake stands.  All of which I thought was ridiculously creative and cute, but I had to be realistic.  I really had about 3 days and unlike most of the other party planners I had intended on making my own cupcakes because that’s just what I do!  So these are the things I decided I was going to do for the party.

Decorations:

  • Custom Banner (What better way to say you are 1 then a year of pictures to remind you)
  • Custom Cupcake Toppers
  • High Chair Banner
  • Balloon Display
  • Photo Booth
  • Custom Thank you Cards
  • Custom Water Bottles

Food:

  • Dessert Table complete with custom chocolate covered Oreos in the theme colors and “camera” sugar cookies.
  • Chocolate Cupcakes with Vanilla Bean Buttercream
  • Vanilla Bean cupcakes with Vanilla Bean Buttercream
  • Pigs in a blanket for the kids
  • Veggie Tray
  • Fried Chicken
  • Queso Dip
  • Chips

This all seemed pretty overwhelming so I ended up ditching the Photo Booth.  I simply just didn’t have the time or the energy given the list of other things that had to get accomplished.

For the Banner, Thank You Cards and Cake Toppers I needed photos!  It was already Wednesday and the party was Saturday so I had to come up with the photo digging through all my digital memorabilia over the last year and get them printed and ready really by Thursday.  CVS photo online to the rescue!  I uploaded the pictures and picked them up at the CVS down the street from me the next morning and it was only .19 cents a picture!   This really came out very cost effective since in addition to the 12 pictures I needed 24 cupcake toppers and 20 thank you cards.

Here’s how the banner came out:


Here are the Thank You Cards:

And the Cupcake Toppers:

Here’s how the dessert table turned out:

You can see my nice balloon display courtesy of Party City.

Admittedly, most of the food items I purchased them from the local super market.  The Fried Chicken was purchased the hubby and then he made the veggie tray and queso dip.  I made the pigs in a blanket and here is what the food table looked like.  The table display was done by my friend Monique!

The chocolate covered Oreos were a big hit and proudly displayed on the right and the custom water bottles on the left.  After all the work it all turned out great.  We all had an amazing time.  I hope you enjoy the pictures and the ideas.  It was a great party!

Check out the Baker’s Bliss website or like them on Facebook.  Thank you Kia for stopping by and sharing your party tidbits with us!!

Happy Party Planning!

Share

I have a little bit of an obsession with Food Network.  If there isn’t a show recorded on DVR that I want to watch, Food Network is my next go-to channel, followed by HGTV.  Food and home improvement … you can clearly see where my passions lie.  One day while blogging and watching Barefoot Contessa, Ina Garten was cooking her “Perfect Roast Chicken“.  I quickly made a mental note that I must make this dish.  An opportunity quickly presented itself and I adapted the recipe just a little.  This dish is well … absolutely DELISH!!!

Not only is this recipe super yummy, but totally falls within the healthy cooking/eating category.  WIN WIN!!!  And just to add one more log to this amazing fire (yeah I’m horrible with analogies, but I try!) it is also a pretty cheap dinner menu item that will impress!!  So I hope you enjoy the Tasty Tuesday recipe this week.

Ingredients:

1 (5 to 6 pound) roasting chicken
Kosher salt
Freshly ground black pepper
1 large bunch fresh thyme (and/or rosemary)
1 lemon, quartered
1 head garlic, cut in half crosswise
2 tablespoons (1/4 stick) butter, melted (can be substituted with olive oil)
2 large yellow onions, thickly sliced
4 carrots cut into 2-inch chunks
4 Yukon Gold Potatoes cut into quarters

When you get the chicken home remove the chicken giblets and pat the outside dry, salt it inside and out, wrap it and keep it in the refrigerator for up to 2 days.

Preheat the over to 425*.  Place the onions, carrots, potatoes and some thyme in a roasting pan.

Pat the chicken dry and liberally salt and pepper the inside of the chicken. Stuff the cavity with the bunch of thyme, lemon, and all the garlic.

Brush the outside of the chicken with the butter and sprinkle again with salt and pepper.

Tie the legs together with kitchen string.  Place the chicken on top and tuck the wing tips under the body of the chicken.

Roast the chicken for 1 1/2 hours, or until the juices run clear when you cut between a leg and thigh. Remove the chicken cover with aluminum foil for about 15 minutes.  I suggest putting this in a bowl, because the juices will seep out of the chicken as it rests.  I did this on a cutting board the first time and literally juice all over the floor and my dog, Sophi, was seriously pleased about this!!!

Allow the vegetable to continue cooking.  Slice the chicken and place it on a platter with the vegetables.  I like to pour some of the juices over the chicken/veggies.  The rest of the juice/gravy put in a gravy boat … I promise your guests will appreciate it!  This serves about 4 people.

Happy Cooking!

Share

Like any year 2012 had its ups as well as its downs, but all in all when the tidbits are added up it was a great year.  As the year draws to a close I started thinking of how fast this year has gone by.  I’m not sure if I am just getting older or if life has just been so busy, but in a blink of an eye we went from January to December.

In no particular order tidbits that stand out are as follows:

Trip to Mexico to celebrate our 30th birthdays.  Being only 11 days apart and having Valentine’s Day smack in the middle makes for a very busy February.  Sipping piña coladas on the beach, reading and relaxing was the perfect way to begin our thirties.


Buying a condo was a HUGE highlight. I cannot believe we are home owners!

My first rodeo!  And I think the highlight of the rodeo was the mutton busting.

Passing the PMP exam.  This test had been on the to-do list for years.  It was nice to not only check it off the list, but to have passed the first time taking the exam … Plus my dad will finally stop bugging me about when I am going to take the test!! :)

Thanksgiving – As my favorite holiday it is no surprise that Thanksgiving is one of the highlights from this year.  Like every year the week/end was jam packed with food, wine, family, friends and laughter.

First Christmas Eve alone with my husband in our new place.  I’ve always spent Xmas Eve with my friends/family or with the in-laws.  This year we flew out to Kansas City on Christmas Day.  We went back and forth about sending the evening with friends, but in the end decided to keep it low key.  I loved staying home and celebrating just the three of us (the husband, me and of course Sophi).

2012 was a very fun year!  But now there is much to look forward to in 2013 and it isn’t even here yet!

So far there are a few fun things on the docket for 2013 …

  • My sister is coming to visit for a few days. I am even taking a day off so we can have a sister day!  It isn’t often we get time just the two of us anymore so I’m super excited for her visit.
  • Throwing a baby shower for my girlfriend and then arrival of her son!
  • A trip to Seattle to see my friend (HOPEFULLY)

And then of course there is … Surprises!  No matter how much of a planner I am life always throws in big and little surprises.

What were your favorite parts of 2012?  Any exciting plans for 2013?

Happy New Year!!

Share

It seems we have come to the end of the wedding related posts.  I’ve shared my bridal shower and the bachelorette party as well as my wedding dress purchasing experience.  And let’s not forget about it pouring down rain only a few hours before what was suppose to be an outdoor ceremony.  Below I’ve listed all of the DIY projects we tackled along the way as well as the vendors we used.

But before we get to that here are just a few of my favorite pictures from the big day!  All of the photos below were taken by Korie Lynn Photography.

How cool is that detail shot?!?!  The pearl bracelet was HANDMADE by my Aunt!  I couldn’t find what I wanted so she made me the most perfect bracelet I could have ever imagined.

I had always dreamed of getting a picture in front of the white house and this was the perfect shot.  Luckily the rain held off until after this picture was snapped :)

This was taken in the lobby of the St. Regis a little while before the ceremony.  We had time to squeeze in a couple more photos so I suggested the purple couch since it matched our wedding colors.  I love that we are all smiles!

And last but certainly not least the picture above!  There I am between the two most important men in my whole life!  My husband to the left and my Dad to the right.  Not to mention all the special faces I can pick out in the crowd behind us.

Okay so there are some of the top pictures of the evening now for the roundup …

DIY Projects:

  1. Invitations
  2. Envelope Calligraphy
  3. Rehearsal Dinner Invites
  4. Escort Cards
  5. Table #s, Stamps and Thank You Cards
  6. Candy Buffet/Bar
  7. Menu Cards

Vendors:

Ceremony/Reception Venue: St. Regis Hotel
Photographer: Korie Lynn Photography
Floral Designer: MultiFlor
Band: ‘Round Midnight
Videographer: Suburban Video
Hair: George Salon
Makeup: Go Go Gorgeous
Wedding Dress: Stephen Yerick
Bridesmaids Dresses: Lazzaro
Groomsmen: Joseph A Bank

Oh and just in case you missed it we spent our honeymoon in Italy – Positano, Sorrento, Cinque Terre and Rome.

Happy Wedding Planning!!

Don’t forget to leave your tidbit by commenting and/or add Life’s Tidbits to your RSS Reader :)

Related Posts Plugin for WordPress, Blogger...
Share