I might be 9 months pregnant and extremely tired, however I can’t seem to turn off the planner in me.  I’m pretty much “done” planning for the baby.  There are a few things left to do at this point, but if they don’t get done before she arrives it will be okay.  For example I still haven’t booked a newborn photographer, there are picture frames in the nursery that don’t have anything in them and I haven’t had my car cleaned {yet}.  These are not big ticket items so I’m not worrying about them too much.  I also haven’t washed any of the baby’s clothes, towels or sheets.  Lucky for me, my mom is going to take care of the laundry once Jellybean arrives so for all intensive purposes I consider that “to do” done.

I have tried to prepare myself and the husband for the baby’s arrival.  We have the hospital bag mostly packed, I’ve gotten a hair cut and have plans to get my nails done on Saturday (super important details … I swear!).  One of the last things on my list is meal prepping.  A lot of new parents laugh at how they are living off PB&Js and/or takeout.  I’m certainly not one to turn my nose up at takeout, however it does get old pretty fast … not to mention expensive.

I have been brainstorming meals that freeze well for about a month.  It was harder than I thought it would be to plan.  My first problem is our freezer really isn’t too big and my second is/was finding the energy to precook these meals.  I did my best to clean out the freezer on Sunday and then I got to cooking.  I made some pretty good progress, but didn’t get through all the recipes I had planned.

Completed: 

  1. Turkey Chili (=6 servings)
  2. Chicken Tortilla Soup (=4 servings – we ate one serving each for dinner the night I made the soup)
  3. Pesto (x2 – we will need to cook the pasta and add tomatoes/chicken, but that’s easy enough)

soup_chili_pesto

Left to Cook/Freeze:

  1. Meatballs
  2. Lasagna

meatballs_lasagna

I am hoping to at least motivate to make the meatballs before JB makes her debut.  But even if I can’t/don’t, it feels good to know we have a few home cooked meals in the freezer to fall back on when we don’t want takeout and we are too tired to cook.

Did you make any meals ahead of your baby’s arrival?  Any recommendations on recipes that are good for freezing?

If you enjoyed this post, please add your tidbit by commenting below.  Don’t forget you can follow us on PinterestInstagramFacebook and Twitter.

Share

In case you missed the big announcement last week … I’m pregnant!  I thought it would be fun to catch you up on all the first trimester tidbits.

pregnancyannouncement

Random Tidbits

December 23, 2013 – Baby’s Due Date

Sophi (our dog) – The first “person” I told I was pregnant.  Yes she “knew” before the husband that we were expecting.  I stupidly took the test while he was at work.  Then I had to patiently wait for him to get home.  He was SHOCKED I was able to hold in the BIG news long enough for him to change into comfy clothes and tell me about his day (which I barely listened – sorry hubby!).  I had him sit on the couch before showing him the positive pregnancy test!!

Jellybean – The baby’s nickname.  We were tired of referring the baby as “baby” or “it” so the husband quickly came up with Jellybean.  Jellybean has morphed into a variety of nicknames including JB, Jelly Belly and Jelly.  So our little one already has a number of nicknames and we haven’t even met him/her yet.

The Girlfriends’ Guide to Pregnancy – My doctor recommended this book at my very first “pregnant” appointment as well as prescribed prenatal vitamins.  This book is hilarious!  It’s written as though you are truly talking to your girlfriend.  I haven’t read it front to back, but I have enjoyed reading/skimming different chapters that apply to me.

What to Expect When you are ExpectingThis book is a classic.  It comes in handy when I have questions like “is this <insert pain/ache/feeling> normal?”.  Unlike Goggling it doesn’t give all these horror stories … ladies if you are newly pregnant DO NOT GOOGLE.  It was advice I was given … didn’t take … and well probably should have because it would have saved me a lot of time spent on stressing/worrying.  This book, my friends, and doctors are MUCH better references {I’m still working on remembering this myself!}.

Gender – The husband and I agreed quickly to find out the gender of the baby at the 18 or 20 week ultrasound.  The husband says I am too much of a planner not to find out the gender before the baby arrived — he’s definitely got me pegged!

Sharing the BIG News

For the most part we tried to tell close friends and family in person.  There were of course cases where we had to tell people over the phone/text/email because of geographical limitations.  We convinced the husband’s parents to sign up for Skype so we could “test it for our trip to Mexico”.  I’m not sure if they completely believed our story, but happily accommodated our request.  This was the only way we could tell them about becoming grandparents without getting on a plane 2 months earlier than planned.  Everyone’s reaction to the pregnancy was a little different, however excitement was a consistent theme.  :)

A few of my favorite reactions …

“Nicole, are you sure? I don’t want to get excited if you aren’t sure!” – My Little Sister

“I knew it, I knew it, I knew it” followed by jumping out of her chair and screaming so loud the dog started barking – My Mother

“Is there something you want to tell me?” – Our friend Evan (Holding up the What to Expect When your Expecting Book … apparently I had forgotten to put the silly book away before he came for dinner!)

We slowly started telling all of our immediate family and very few close friends at about 7 weeks.  The rest of our family, friends as well as co-workers we told after 14 weeks.  A lot of people were surprised we waited so long to tell them.  Some of it was us being superstitious and the other part was wanting to get the thumbs up from the doctors for all those first trimester tests.  Let me just say though it was EXTREMELY hard not to share it with all our loved ones right away.  As the husband will attest I hate keeping “good secrets”.

Symptoms

Morning sickness / nausea – and let’s be honest this really needs to be renamed to ALL DAY sickness.  Or … how about pregnancy hangover?  I never actually got sick, but had that feeling I could get sick at any moment for most of the day.  Carbs quickly became my BFF.  I also started eating small snacks in between meals, which helped, but didn’t completely alleviate the issue.

Fatigue – At first I would attempt to relax {read sleep} on the couch after work.  It didn’t take long before I started getting into my sweats, grabbing the dog, pulling down the blackout blinds and climbing into bed.  The hubby was at times surprised to come home from work and find me in bed, asking “why are you in bed?” … my response, “I’m pregnant and tired and if I’m going to sleep I figured I should be comfortable!”  LOL.  At first I was worried I wouldn’t be able to sleep at night after an early evening nap, but 10pm would come and surprisingly I was more than ready to climb back into bed.

Heartburn –  I have never been one to get heartburn.  In fact the first time it happened I didn’t even know what it was.  While explaining the “feeling” to my husband and he just looked at me and said “Nicole, it’s heartburn”.  I was pretty surprised and after confirming with a couple friends and the doctor (twice) I started taking Tums to combat the heartburn.

What I Miss

I’m not going to lie, at first I really missed having a glass of wine when out to dinner.  Though I quickly got over it.  The thing I missed the most in the first trimester (heck the second too, so far) was not having to worry about what I was eating.  Until I was actually pregnant I didn’t realize how many restaurant dishes have raw egg, soft cheese, “raw” meat or other food on the no-no list for pregnant women.
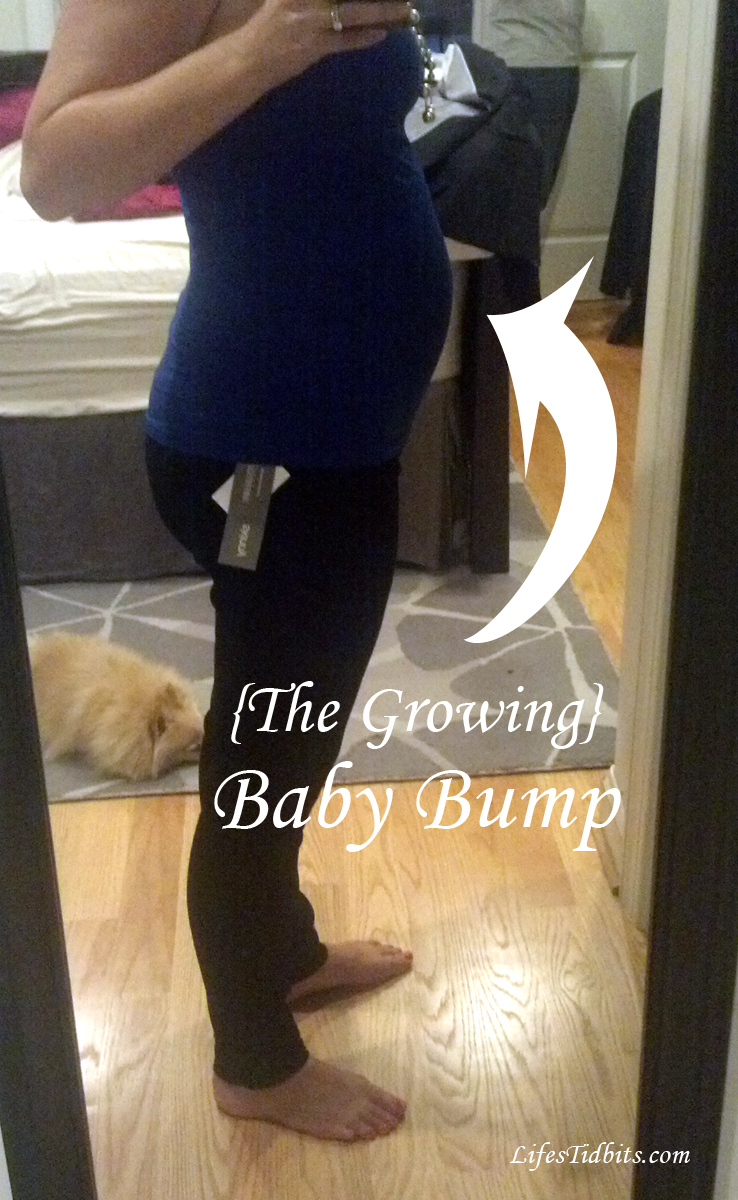
Maternity Clothes

Around week 13 I gave in and started rocking some maternity clothes.  While I still “fit” into my non-maternity clothes they just weren’t comfortable.  The funniest part was that my shirts would have fit a lot longer if the “twins” had taken on a life of their own.  LOL!  In any case, my friend {love you Rebecca!} was kind enough to let me borrow her maternity clothes.  Although she didn’t have  a ton of warm weather clothes it was just enough to hold me over until I made it to the store.

I think that pretty much sums up the first trimester.  Did I miss anything??

Any tidbits from your 1st trimester you care to share?  I’d love to hear them!

signiture_nicole


If you enjoyed this post, please add your tidbit by commenting below.  Don’t forget you can follow us on PinterestInstagramFacebook and Twitter.

Share

More often than not I am rushing around the house in the morning getting ready for work.  The morning routine includes all the normal things one normally does plus walking the dog and making lunches for me and the hubby.  Despite being in the kitchen doing the lunches I often forget to take meat out of the freezer and put it in the refrigerator.  Does that ever happen to you?  Forget to take the chicken, beef, pork or fish out of the freezer to properly prepare for dinner that evening?  Since I make this mistake often I will sometimes go to the store on the way home from work and purchase what I need.  Other times I get home and slap the meat on the counter and pray it defrosts quickly so I won’t have to nuke it.  For some reason defrosting in the microwave seems to always “pre”cook the meat, which I don’t find appealing.

Recently my mother-in-law taught me a great tip for defrosting meat quickly …. place the meat on a metal cookie sheet.

Source

I’m not really sure why this works, but it does so I’m not going to fight it!  Next time you forget to take dinner out of the freezer in the morning to thaw go ahead and slap it on a metal sheet pan.  Wait a little while and flip the meat.  The quick defrosting time will definitely not disappoint.  What’s your tip for defrosting meat quickly?

Happy Cooking!

If you enjoyed this post, please add your tidbit by commenting below.  Don’t forget you can follow us on Pinterest, Instagram, Facebook and Twitter.

Share

It seems we have come to the end of the wedding related posts.  I’ve shared my bridal shower and the bachelorette party as well as my wedding dress purchasing experience.  And let’s not forget about it pouring down rain only a few hours before what was suppose to be an outdoor ceremony.  Below I’ve listed all of the DIY projects we tackled along the way as well as the vendors we used.

But before we get to that here are just a few of my favorite pictures from the big day!  All of the photos below were taken by Korie Lynn Photography.

How cool is that detail shot?!?!  The pearl bracelet was HANDMADE by my Aunt!  I couldn’t find what I wanted so she made me the most perfect bracelet I could have ever imagined.

I had always dreamed of getting a picture in front of the white house and this was the perfect shot.  Luckily the rain held off until after this picture was snapped :)

This was taken in the lobby of the St. Regis a little while before the ceremony.  We had time to squeeze in a couple more photos so I suggested the purple couch since it matched our wedding colors.  I love that we are all smiles!

And last but certainly not least the picture above!  There I am between the two most important men in my whole life!  My husband to the left and my Dad to the right.  Not to mention all the special faces I can pick out in the crowd behind us.

Okay so there are some of the top pictures of the evening now for the roundup …

DIY Projects:

  1. Invitations
  2. Envelope Calligraphy
  3. Rehearsal Dinner Invites
  4. Escort Cards
  5. Table #s, Stamps and Thank You Cards
  6. Candy Buffet/Bar
  7. Menu Cards

Vendors:

Ceremony/Reception Venue: St. Regis Hotel
Photographer: Korie Lynn Photography
Floral Designer: MultiFlor
Band: ‘Round Midnight
Videographer: Suburban Video
Hair: George Salon
Makeup: Go Go Gorgeous
Wedding Dress: Stephen Yerick
Bridesmaids Dresses: Lazzaro
Groomsmen: Joseph A Bank

Oh and just in case you missed it we spent our honeymoon in Italy – Positano, Sorrento, Cinque Terre and Rome.

Happy Wedding Planning!!

Don’t forget to leave your tidbit by commenting and/or add Life’s Tidbits to your RSS Reader :)

Share

During the wedding planning process I started reading a lot of blogs.  Sooooo many brides were doing DIY projects.  The wedding blogs really got my planning/artistic juices flowing.  I would read about how simple it is to make X all on your own and immediately I would want to take on the DIY project.  I would gently remind myself I am not the artist in the family, that would be my sister, the MOH.

My friend from work was kind enough to share A LOT and I really mean A LOT of her wedding/party planning expertise with me.  One of her suggestions was to check out her friend’s blog called Aisle with Style.  As I was browsing the posts I found a post for the wedding invitations my friend had done for her brother’s wedding.  When I stumbled upon the blog post I instantly wanted to make my own invitations.  I emailed my friend and asked her for the details on the invitations she made for her sister-in-law’s wedding.  Then I forwarded the post to my then fiance and mother.

Both liked the invitations; however neither was excited about the DIY part.  My husband was very concerned about hidden costs of DIY as well as the time it would take us to do the invites.  I started pricing out invitations online.  The non diy invitations would still cost a pretty penny even from the online vendors I found.  While visiting my parents for Thanksgiving we spent sometime doing wedding stuff.  Sunday we went with my mom to register at Bloomingdale’s.  There just happen to be a paper/invitation store in the same complex so we stopped in to check out the invitation designs as well as pricing.  As I had assured both my mother and husband the invitations were expensive! Both were finally, mostly, on board with a little (or a lot as the case maybe be) DIY action.

After purchasing the paper and the pretty purple envelopes.  I could barely contain my excitement.  There was only one issue, I had a super old version of PhotoShop and it wasn’t compatible with a lot of the new functionality.  My husband to the rescue!  He quickly jumped onto his computer and downloaded a 30 day trial version of the newest PhotoShop version.  And then the fun began. YAY!

I spent many hours camped out on the couch, watching tv and and cutting our invitations and insert cards down to size.  Below is a little picture of how I totally took over the coffee table to create our invitations.

In the end we had three pieces to our wedding invitations – the invitations, room block insert card and rsvp post card insert.

After completing all the invitation the next step was to do the envelopes.  Check out our DIY invitation calligraphy here.  We also made custom stamps for our wedding invitations, which you can see here.

My tips for a successfully DIY invitation:

1)  Buy a paper cutter.  A good paper cutter is essential for straight lines and a sharp blade is ideal so the edges don’t fray.

2)  Make one complete invitation before printing 100 copies.  When I made my inserts I didn’t put it all together until I had printed multiple copies. I think realized the Room Block and RSVP text was way to big and had to reprint.  Waste of paper and time.

3)  Print High resolution.  I printed the 1st few on standard.  They looked nice, but when the husband took over the printing press he printed on High (he had no idea what setting I had used) the colors popped more and so we had to re-print the ones I had initially printed.

4)  Buy extra paper.  I suggest printing on regular white paper for a while until you think it is right.  See #2 and #3 I needed extra paper because of small modifications and printer settings.

5)  Start early.  Everyone laughed when I started my invitations 8 months out. But I wasn’t motivated some days or just plain didn’t have time.  Giving myself a lot of time to complete the project reduced my stress level and made it more fun.

Happy DIY!

Don’t forget to leave your tidbit by commenting and/or add Life’s Tidbits to your RSS Reader :)

Related Posts Plugin for WordPress, Blogger...
Share