So remember when I made the tortilla soup?  I mentioned how I loved that recipe as well as the meatball recipe from the 4 Hour Body diet.  I’ve never been a big sausage person, however for some reason I LOVE it in this meatball recipe. If you wanted to make this slightly more healthy you could substitute in ground turkey and turkey sausage.

I’ve made this recipe a number of time with a couple different variations.  The latest version include a whole bag of spinach. I think it makes the meatballs look more appetizing as well as putting your vegetable serving right into the meatball!  I wish I could take credit for this idea, but it was my friend’s idea.

Ingredients:

1 lb ground beef
1 lb spicy (or sweet) Italian sausage
1 tsp garlic powder
2 tbsp Italian seasoning
½ small yellow onion, roughly chopped
½ cup almond meal (or bread crumbs or wheat germ)
2 eggs, whisked
1 tsp red pepper flakes
Black pepper and salt to taste
1 package chopped spinach (cooked)

Cook the frozen chopped spinach per the directions on the bag.  Meanwhile combine all the other ingredients in a glass bowl and mix together.  Don’t forget to remove the Italian sausage from its casing.

Once the spinach is done cooking allow it to cook and then squeeze as much of the water as possible out of the spinach.  You don’t want soggy meatballs!  Mix in the spinach.  It’s best to do it with your hands (gross I know!).

Create ~24 medium size meatballs.

Recipe Spicy Meatballs, 4 Hour Body / Slow Carb Diet | Life's Tidbits

Pre-heat your grill pan (these can also be cooked in the oven if you prefer).  Once hot, add the meatballs. Fry 5–7 minutes, until bottom is browned.

Recipe Spicy Meatballs, 4 Hour Body / Slow Carb Diet | Life's Tidbits

Turn meatballs to opposite side and cook for another 5–7 minutes. It will take several batches to cook all 24 meatballs.

If on the 4 hour body diet serve it with lentils or black beans.  If not, then your pantry is your oyster.  These will taste great with almost any side!

Recipe Spicy Meatballs, 4 Hour Body / Slow Carb Diet | Life's Tidbits

About three meatballs is a serving. And boy does this meal make a fabulous lunch.

Happy cooking!

Don’t forget to leave your tidbit by commenting below :)

Share

My friend at work has been doing this slow carb / four hour body diet.  Now I am not going to speak to the diet, however I did decide to try a couple of the recipes from the PDF she sent me!  My favorites are the meatballs and the creamy chicken tortilla soup!!!  I’ve made a couple of minor changes to the soup, however the recipe is based on the Four Hour Body diet recipe.

INGREDIENTS:

  • 6 cups of chicken broth
  • 1 can of refried beans (fat free)
  • 1 can of Rotel tomatoes
  • 1 can of Fire Roasted tomatoes
  • 1 can of black beans
  • 1 can of Mexican or southwest corn (drained)
  • 1 tsp hot sauce (omit if you don’t like any kick to your soup)
  • Cajun seasoning (to taste)
  • 1 rotisserie chicken chopped up, skin removed and bones removed

Recipe: Creamy Chicken Tortilla Soup | Life's Tidbits

Recipe: Creamy Chicken Tortilla Soup | Life's Tidbits

I doubled the recipe so yours won’t look like as much in a big pot.  The chickens were on sale for $3 … yes $3 crazy, right?  So I just couldn’t resist buying two.  Also this soup tastes fabulous if you freeze it and then let it defrost on your desk at work in the morning.  Who doesn’t like easy lunches?? Okay onto the cooking portion of this blog.

Bring the chicken broth to a boil and whisk with refried beans.  Add all the ingredients (except the chicken) and stir together.

Recipe: Creamy Chicken Tortilla Soup | 4 Hour Body | Healthy and Easy Dinner | Life's Tidbits

Make sure the chicken is broken into bite size pieces. It makes the soup easier to eat.  Then add to the pot.

Heat thoroughly on stove for at least 5-10 minutes, which also allows the flavors to develop.

Recipe: Creamy Chicken Tortilla Soup | 4 Hour Body | Healthy and Easy Dinner | Life's Tidbits

It will make 6-8 servings or 12-16 if you double the recipe like me.  Serve immediately or put in containers to freeze!!

Recipe: Creamy Chicken Tortilla Soup | 4 Hour Body | Healthy and Easy Dinner | Life's Tidbits

It is super yummy!  The husband and I are big fans and it is very much a recipe made weekly at our house as of late.

Happy Cooking!

If you enjoyed this post, please add your tidbit by commenting below.  Don’t forget you can follow us on PinterestInstagramFacebook and Twitter.

Share

My sister and I found this recipe for pumpkin bread one fall afternoon when trying to decide what to make that wasn’t chocolate chip cookies. :) Cookies are our go to hang out and watch a movie snack.

The best pumpkin bread recipe that's very moist. Perfect for fall and Thanksgiving! | Life's Tidbits

We ate nearly a whole loaf in one sitting (or really standing in the kitchen over the loaf of bread) it was THAT good!  It’s now a must have item in our family for Thanksgiving dinner.

Besides the canned pupmpkin most items are staples and you probably already have the ingrediants in your kitchen.

The best pumpkin bread recipe that's very moist. Perfect for fall and Thanksgiving! | Life's Tidbits

Pumpkin Bread Recipe

Ingredients:

2 cups canned pumpkin (or homemade pumpkin puree)
3 cups sugar
1 cup water
1 cup vegetable oil
4 eggs
3 1/3 cups all purpose flour
2 teaspoons baking soda
2 teaspoons cinnamon
1 teaspoon salt
1 teaspoon baking powder
½ teaspoon nutmeg
¾ teaspoon ground cloves

The best pumpkin bread recipe that's very moist. Perfect for fall and Thanksgiving! | Life's Tidbits

Directions:

Pre-heat the oven to 350 degrees.

In a separate bowl sift the flour into a bowl.  On your last cup of flour add the baking soda, baking powder, cinnamon, salt, nutmeg and cloves and sift together.

The best pumpkin bread recipe that's very moist. Perfect for fall and Thanksgiving! | Life's Tidbits

Combine pumpkin, sugar, water, oil and eggs in a bowl and beat together until mixed well.

The best pumpkin bread recipe that's very moist. Perfect for fall and Thanksgiving! | Life's Tidbits

Mix the dry ingredients with the wet ingredients slowly and beat until smooth.  Unlike chocolate chip batter this batter does NOT taste good. My sister and I made the mistake of trying the batter and thought the bread was going to be terrible.  But it’s is amazing once it is cooked, promise. So just hold off on any tasting. :)

The best pumpkin bread recipe that's very moist. Perfect for fall and Thanksgiving! | Life's Tidbits

Grease two 9 x 5 inch loaf pans with Pam or any nonstick spray. For easy clean up I recommend putting tin foil in the bottom of the pans first.  Pour the batter into the 2 loaf pans and try to evenly dividing the batter between the two.

The best pumpkin bread recipe that's very moist. Perfect for fall and Thanksgiving! | Life's Tidbits

Bake at 350 degrees for 60-70 minutes or until a toothpick comes out clean.  Get ready for your house/apartment to smells OH so YUMMY as the loafs cook! Remove from oven and allow loafs to cool before cutting.

The best pumpkin bread recipe that's very moist. Perfect for fall and Thanksgiving! | Life's Tidbits

Cut and server!  And watch out because you will without a doubt eat more than one slice. :)

The best pumpkin bread recipe that's very moist. Perfect for fall and Thanksgiving! | Life's Tidbits

Happy Cooking!!

signiture_nicole


Don’t forget to leave your tidbit by commenting below:)

Recipe from the Kitchen of: BlogChef.net

Share

“Life itself is the proper binge.” ― Julia Child

I had foot surgery about a year and a half ago and while I was on “couch rest” I watched Julie & Julia so many times I can’t even count.  Since then I’ve been talking about making boeuf bourguignon.

Last weekend I finally got my act together went to the store Friday after work purchased everything and started prepping.  As I was reading through the recipe I realized it had to cook for 2 1/2 – 3 hours.  Ooopps and I mean big OOOPPPS.  It wasn’t even in the oven until 7:15pm, which meant we wouldn’t eat until 9:45pm.  Off to the Thai place down the street my husband went to get us dinner as I continued to cook.  Luckily Julia Child includes directions on how to serve it later.  So here is my tip … cook this on a Saturday night! After working a full day this meal is a bit of an undertaking for a Friday, in my opinion.

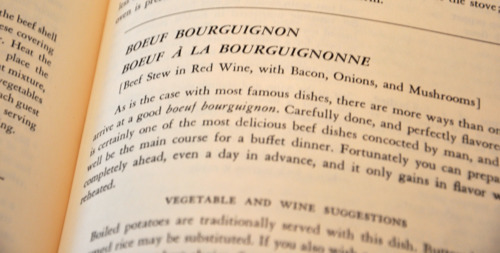
I worked mainly off of Julia Child’s recipe from Mastering the Art of French Cooking.  I should mention I did make a few minor modifications.  This recipe serves 6 people or makes for fabulous left overs later in the week!
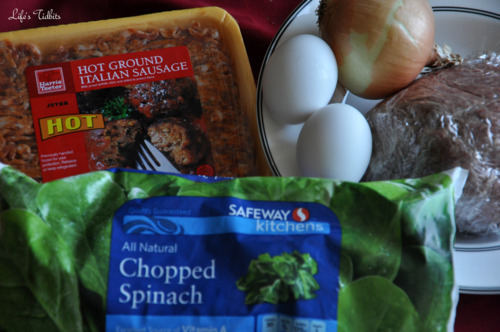
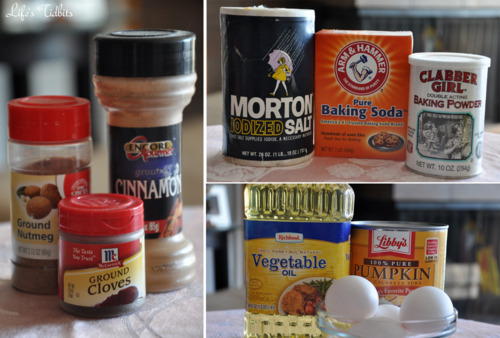
Ingredients

9- to 10-inch, fireproof casserole dish, 3 inches deep
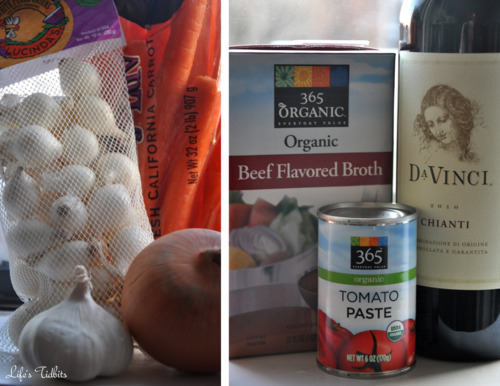
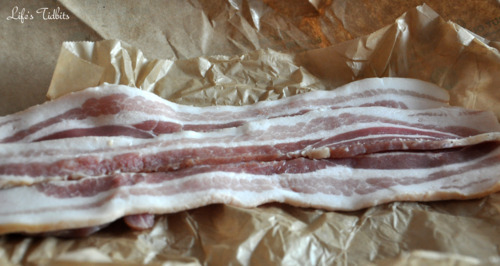
6 oz bacon
1 Tbsp. olive oil or cooking oil
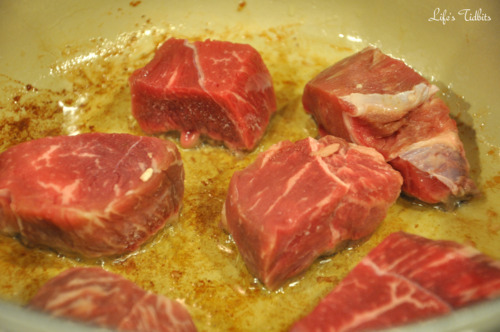
3 pounds lean stewing beef, cut into 2-inch cubes
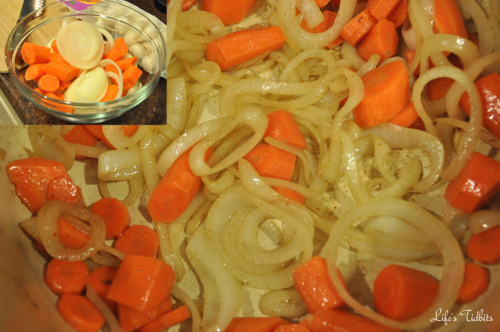
1 sliced carrot (I used 4 carrots)
1 sliced onion
1 tsp. salt
1/4 tsp. pepper
2 Tbsp. flour
3 cups full-bodied, young red wine, such as a Chianti (I used 2 cups)
2 to 3 cups brown beef stock or canned beef bouillon (I used 2 cups)
1 Tbsp. tomato paste
2 cloves mashed garlic (I used 3 big cloves of garlic)
1/2 tsp. thyme
Crumbled bay leaf
Blanched bacon rind
18 to 24 small white onions, brown-braised in stock (ingredients below)
1 pound quartered fresh mushrooms, sautéed in butter (Didn’t include)
Parsley sprigs  (Didn’t include)

Ingredients for Brown-Baised White Onions
1 ½ tablespoons butter
1 ½ tablespoons oil
½ cup red wine (or bouillon, beef stock or water)
salt and pepper, to taste
4 parsley sprigs
½ bay leaf
¼ teaspoon thyme

Remove rind from bacon, and cut bacon into lardons (sticks, 1/4 inch thick and 1 1/2 inches long). Simmer rind and bacon for 10 minutes in 1 1/2 quarts of water. Drain and dry.

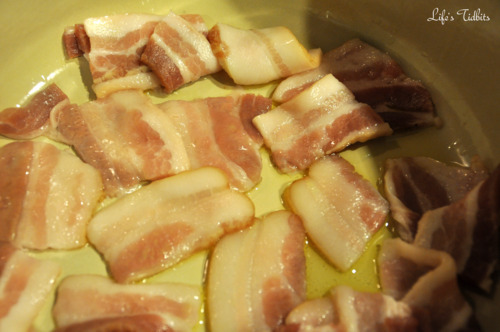
Preheat oven to 450 degrees.  Sauté the bacon in the oil over moderate heat for 2 to 3 minutes to brown lightly.

Remove to a side dish with a slotted spoon. Set casserole aside. Reheat until fat is almost smoking before you sauté the beef.  Dry the stewing beef in paper towels; it will not brown if it is damp. Sauté it, a few pieces at a time, in the hot oil and bacon fat until nicely browned on all sides. Add it to the bacon.

Chop the onion and carrot(s).  In the same fat, brown the sliced vegetables. Pour out the sautéing fat.

Return the beef and bacon to the casserole and toss with the salt and pepper. Then sprinkle on the flour and toss again to coat the beef lightly with the flour.

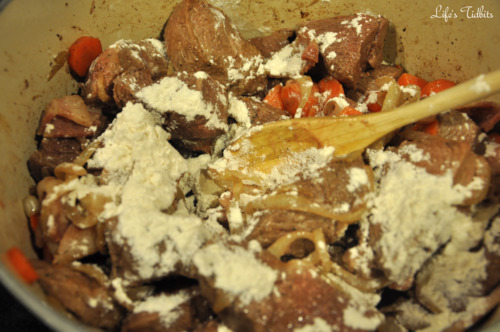
Set casserole uncovered in middle position of preheated oven for 4 minutes. Toss the meat and return to oven for 4 minutes more. (This browns the flour and covers the meat with a light crust.) Remove casserole, and turn oven down to 325 degrees.

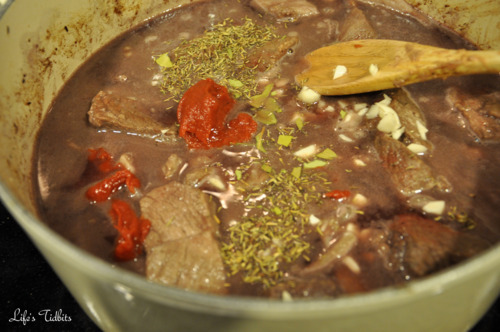
Stir in the wine, and enough stock or bouillon so that the meat is barely covered. Add the tomato paste, garlic, herbs, and bacon rind. Bring to simmer on top of the stove.

Then cover the casserole and set in lower third of preheated oven. Regulate heat so liquid simmers very slowly for 2 1/2 to 3 hours. The meat is done when a fork pierces it easily.

While the beef is cooking, prepare the onions and mushrooms. Set them aside until needed.

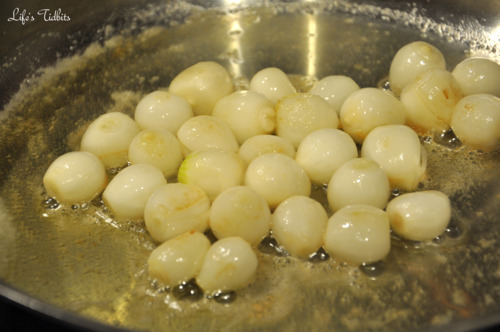
When the butter and oil are bubbling in the skillet, add the onions andd saute over moderate heat for about 10 minutes, rolling the onions about so they will brown evenly. Be careful not to break the skins.

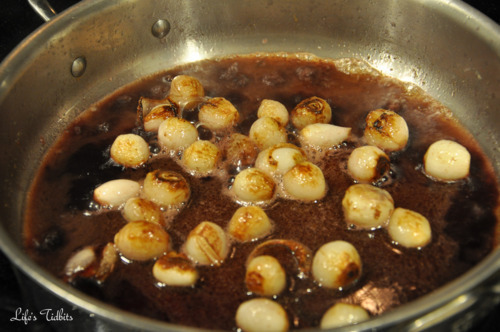
Pour in the wine and season to taste. Wrap the herbs in cheesecloth and add the herb bouquet to the pan.

Cover and simmer slowly for 40 to 50 minutes. Remove herb bouquet and put them aside.

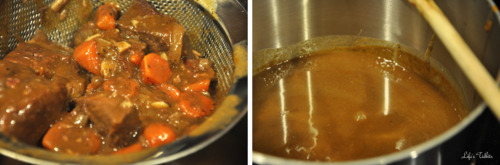
When the meat is tender, pour the contents of the casserole into a sieve set over a saucepan.

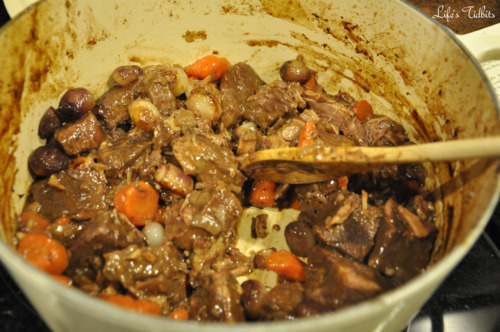
Wash out the casserole and return the beef and bacon to it. Distribute the cooked onions (and mushrooms) over the meat.

Skim fat off the sauce. Simmer sauce for a minute or two, skimming off additional fat as it rises. You should have about 2 1/2 cups of sauce thick enough to coat a spoon lightly. If too thin, boil it down rapidly. If too thick, mix in a few tablespoons of stock or canned bouillon. Taste carefully for seasoning. Pour the sauce over the meat and vegetables. Recipe may be completed in advance to this point.

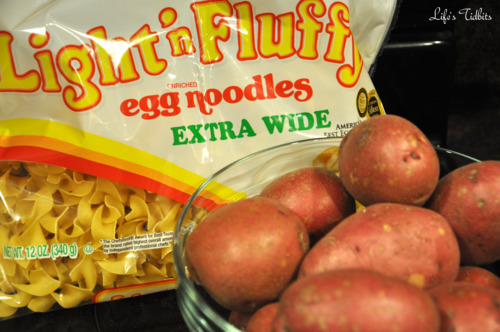
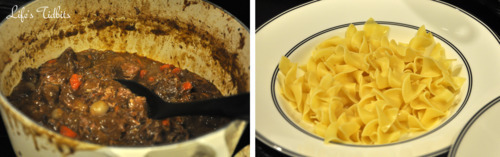
For immediate serving: Cover the casserole and simmer for 2 to 3 minutes, basting the meat and vegetables with the sauce several times. Serve in its casserole, or arrange the stew on a platter surrounded with potatoes, noodles, or rice, and decorated with parsley.

For later serving: When cold, cover and refrigerate. Make sure to start the potatoes and noodles before you warm up the the boeuf bourguignon.  Bring the stew to a simmer, cover, and simmer very slowly for 10-15 minutes, occasionally basting the meat and vegetables with the sauce.

Can you say YUM?!?!  This recipe takes a lot of time, but it’s easy.  I definitely plan to make it for a dinner party in the near future.

Bon Appetit!!

Don’t forget to leave your tidbit by commenting below :)

Share

I love me some guacamole and when I am in Mexico on vacation guacamole is a MUST!!  We’ve gone two whole days on vacation without guacamole and that is just way too long if you ask me.  So off to the grocery store we went, picked up food for the week and a ton of guac ingredients.  The fun this about guac is you can make it in SO many different ways.  My recipe differs from my friend Rebecca’s recipe, but they are both super yummy!

As we ate our guacamole last night there was a very beautiful sunset.  Check it out…

Sunset in Ixtapa, Mexico | Life's Tidbits

Ingredients:

2 Avocados
1 Lime juiced
2 Cloves of garlic
1/4 Cup of red onion
1 Tomato (small)
1/3 Jalapeno (or less to taste)
Salt (to taste)

Recipe - Guacamole Ingredients | Lifes's Tidbits

Making guacamole is incredibly easy and pretty quick as well.  Just make sure your avocados are ripe or mashing them becomes a huge issue.

Mash the avocados.

Recipe - Guacamole | Lifes's Tidbits

Then add in minced jalapeno and garlic as well as the lime juice and some salt – stir.

Recipe - Guacamole Ingredients | Lifes's Tidbits

Add chopped onion, tomato and a little extra salt – mix well.

Recipe - Guacamole in Mexico | Lifes's Tidbits

Refrigerate for at least 20-30 minutes to let the flavors develop.  Serve with tortilla chips, quesadillas or whatever else you prefer.  We ate ours on the porch last night with some tortilla chips.

Recipe - Guacamole in Mexico | Lifes's Tidbits

Happy Cooking!

Don’t forget to leave your tidbit by commenting below :)

Related Posts Plugin for WordPress, Blogger...
Share